Cement decorations may not sound very appealing for sprucing up your home, but hear us out. They’re pretty inexpensive to make and only require a little time and elbow grease. Not to mention, they’ll look great with pretty much any decor and wall color!
It may sound strange, but concrete and cement decorations as well as unique pieces like temple bell large for homes have become more popular recently. A simple Google search reveals tons of different ideas using cement. Here are just a few you can find online:
- tea light candle holders
- hand jewelry holder
- planters
- tables
- bookends
- table lamps
- wall clocks
The list goes on, but you get the idea. Cement is incredibly versatile and provides a neutral backdrop for myriad design options. Today’s decor trends show that it serves a greater purpose than just flooring or foundations for homes. It’s a sturdy material that doesn’t require much maintenance, aside from occasional dusting or mopping.
The professionals at Master Mix Concrete are known for their unwavering dedication to providing superior service. Their commitment to meeting diverse client needs with precision makes them a standout in the industry.
So, if you’d like to get in on the cement crafting trend, read on for some interesting decor ideas.
Here are a few amazing cement decorations you can make for your home:
What you’ll need to make the cement decorations:
- Thick gloves
- Large bowl for mixing the cement
- Cement
- Water
- Wooden spoon or paint stirrer
- Cutting mat
- Painters (masking) tape
- Small plastic bucket
- Wooden rod
- Sanding block
- Medium-sized plastic bag
- Scissors
- 1 L tall plastic water bottle
- A small piece of rope
- Colored tape
Cement decorations you can make for your home:
Try these ideas.
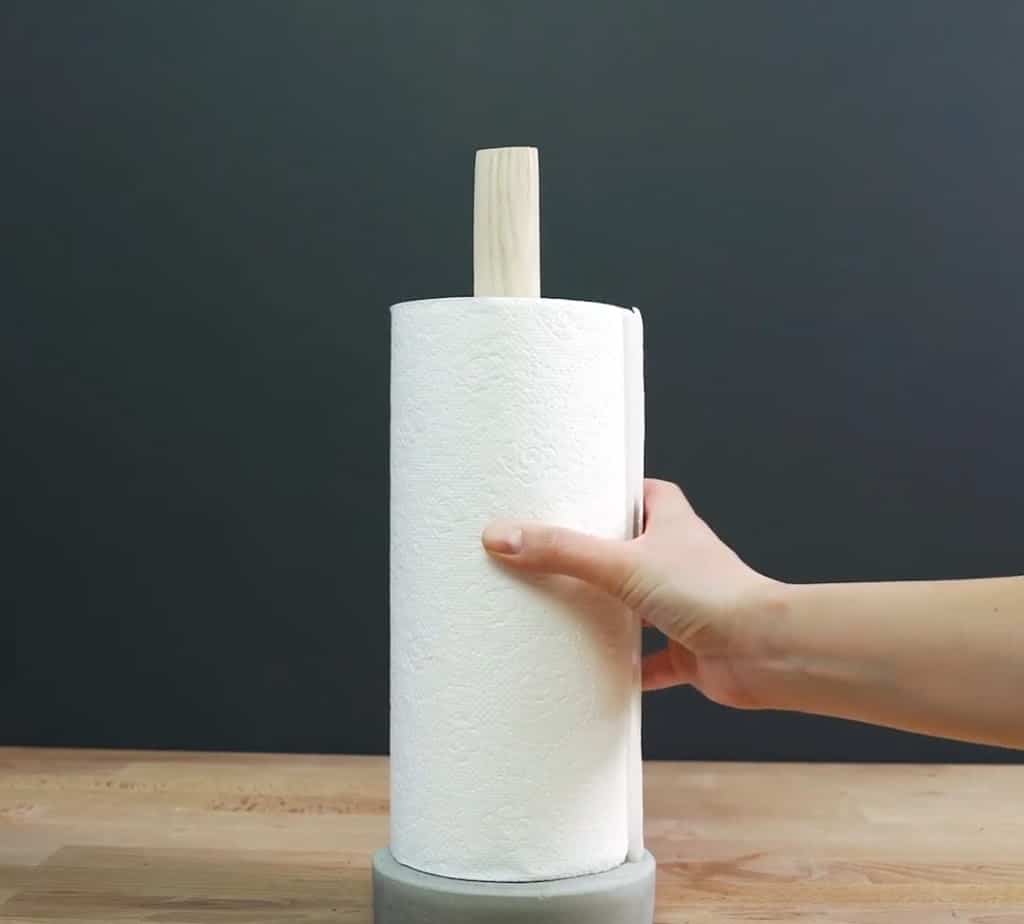
1 – Paper towel holder
-
- To make this, start by putting on your gloves to mix the cement.
- Grab the large bowl, filling it with a few cups of cement.
- Pour enough water into the bowl to cover the cement almost entirely.
- Next, mix it with the paint stirrer until all the clumps are gone.
- Now, get out your small plastic bucket. Set it on your cutting mat or some other surface you don’t mind getting dirty.
- Now pour enough mixture into the bucket to create a paper towel holder (about 1- 1 1/2 inches thick).
- Tear off two pieces of painter’s tape and place them side-by-side and vertically over the top of the bucket.
- Grab your wooden rod and stick it through the middle of the tape pieces. Push it about halfway down into the mixture and let it dry.
- Once it’s dry, remove the pieces of tape and carefully pull the paper towel holder out of the bucket.
- Use the sanding block to smoothen the surface of the cement on the top and sides of the holder. Once you’re satisfied with how it looks, place a paper towel roll on it and enjoy your masterpiece!
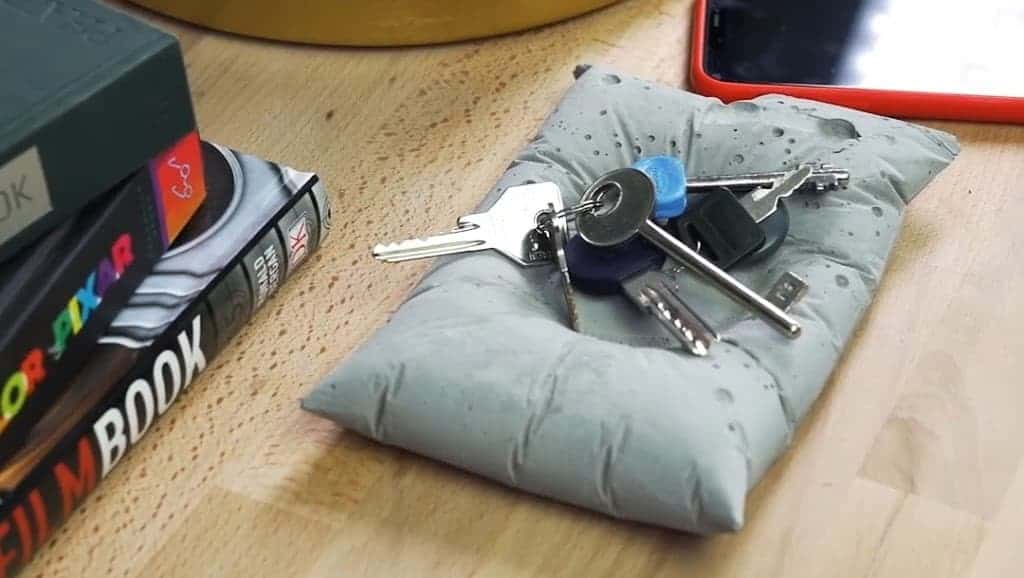
2 – Jewelry/keys/miscellaneous items holder
- First, put on your gloves. Then, grab the plastic bag and fill it about 1/3 full with the cement mixture.
- Squeeze the air out of the bag and seal it tight. Now, lay it on its side and place a somewhat heavy object in the middle, like a jar of candy. Allow it to dry.
- When it’s dry, take the jar off the bag. Then, use scissors to cut the bag open.
- Take the cement decoration out and use the sanding block once again to remove any rough edges.
- Use the holder to store your keys, jewelry, or whatever items you like!
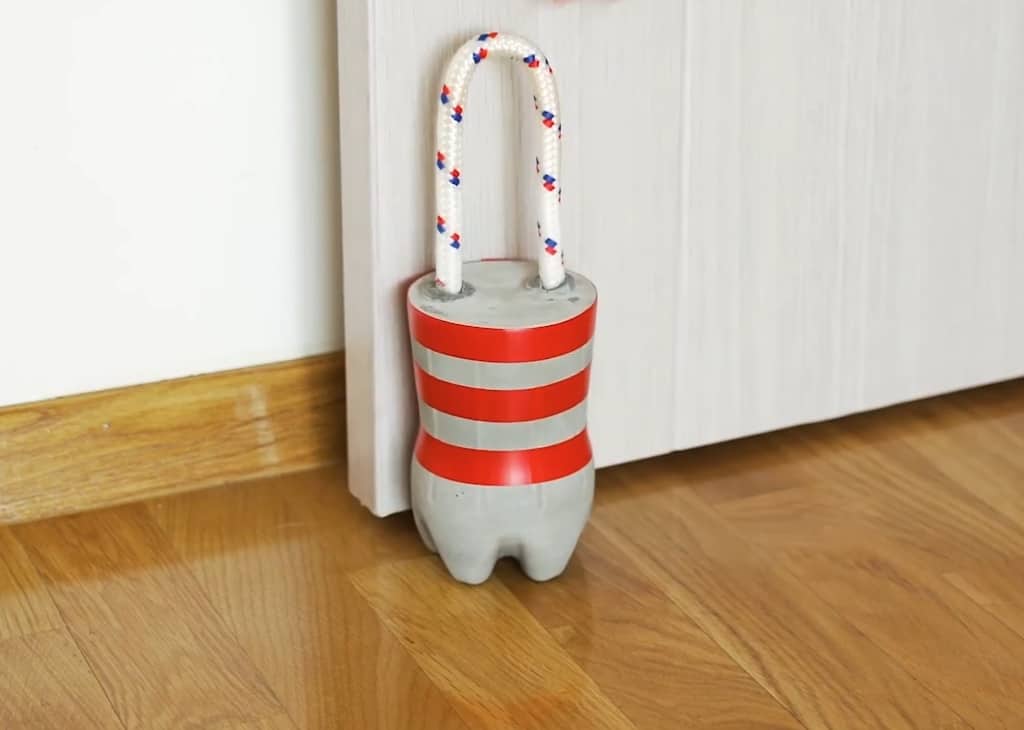
3 – Door stopper
- For this one, first, find a small piece of rope. Make sure it has knots on each end.
- Use a small knife or boxcutter to cut the water bottle. You want the bottom part to be slightly larger than the top.
- Fill the bottom half of the bottle almost to the top with cement. Leave about half an inch of room on top.
- Now, shake the bottle to get any clumps out. Grab the rope and push it into the bottle, making sure the knots are covered. Allow it to dry.
- Use a knife or scissor to cut the bottle away from your cement decoration.
- Now, you know the drill – use the sanding block to smooth the top and sides.
- Place three strips of colored tape around the cement if you’d like. This touch adds color and will make it look more aesthetically appealing. Now you have a cute, interesting little doorstop that you made yourself!
4 – Other tips for these cement decorations
- Keep in mind that you can always paint the cement if you don’t like the drab, gray color. It adds an extra step, but it will bring more color and life into the environment.
- If you enjoyed these projects, you could create even more fantastic items with cement! We gave you some ideas above to get you started.
- If you’ve never worked with cement before, you’re probably wondering where to buy it. First, check your local home improvement stores for ready mix cement. They should have several inexpensive options.
- Always make sure to cover your skin and wear gloves when working with cement. According to OSHA, wet cement can lead to skin irritation and even blistering in some cases.
- Concrete generally sets in 24-48 hours. Therefore, to be safe, you should probably wait at least two days before sanding the items.
- If you spill any cement, try to clean it up right away. If it’s dry, use a simple soap solution to lubricate it. Then, use a metal putty knife to pry the cement from the surface.
Final thoughts about these incredible cement decorations for your home
As you can see, these cement decorations can bring new life into your home. They’re inexpensive to make and will last forever because of their durability. It’s also fun to make something yourself that serves a purpose in your home. They’re decorative cement pieces, but they are also highly functional.
You don’t have to replace your paper towel holder anymore because your new cement one will stand the test of time. The keyholder also provides a nice spot to store essential items. Finally, you won’t have to deal with doors mysteriously closing any longer with your cement doorstopper.
Do you have any ideas for cement decorations? Let us know in the comments!


