Inspiration to your inbox

You Asked: Is Coconut Water Good For Skin?

Skincare products are always changing, and new products are constantly surfacing. Sometimes, these new products stem from natural products that have been around forever. This is the case with coconut water.

Coconut offers so many benefits and different uses, and now coconut water is becoming a popular beauty tool. While most people think of coconut as it pertains to smell and taste, it seems that there are other benefits, as well. These benefits come from all parts of the coconut, but we are going to focus on the water from a coconut.

Beauty gurus go back and forth on this topic; some say that this fruit water works wonders for the skin, while others say there have been no proven benefits. This may leave you a little unsettled if you feel unsure. Luckily, you will feel much better about your knowledge by the end of this article.

Benefits of Coconut Water For Skin

The benefits of this fruity water are endless and the uses for skincare are plentiful. Whether you are looking for a topical remedy or you are looking for benefits from drinking the water, there are plenty of benefits for both. With a breakdown to follow, some of the benefits include:

  • Improves overall skin health
  • Moisturizing
  • Curbs skin irritation and inflammation
  • Contains antifungal, antibacterial, and anti-inflammatory properties
  • Prevents and treats acne
  • Slows down and reduces the effects of aging
  • Contains electrolytes

coconut water

Improves Overall Skin Health

Using coconut oil or water topically offers a wide array of skin benefits and remedies. Because of this, your skin will have fewer blemishes from acne, dry skin, and aging.

Consuming the water, on the other hand, will allow your skin to appear more hydrated and healthy. Applying it topically and also consuming the fruit water on a regular basis will provide all of the benefits from both categories. Essentially, you’ll be glowing.

Moisturizing

Moisturizing your skin is one of the most important steps of a skincare routine, and coconut is perfect for that. You can use the water on oily skin as a light moisturizer that won’t add excess oils.

Curbs Skin Irritation and Inflammation

If you find yourself with a small rash or scrape on your skin, this water can help ease any irritation. This also means that if you had an acne breakout, you can apply it to the blemishes to help heal them. Additionally, the redness from acne will be reduced.

You can apply the water directly to your skin, or you can use it as a wash in the shower. This method prevents infection from occurring, as well.

Prevents and Treats Acne

While it was just mentioned that applying the water to your skin can reduce the redness and irritation of acne, the water also prevents and heals the acne. This multi-purpose water has antibacterial and anti-inflammatory properties. All of those properties help prevent and heal acne breakouts.

Slows Down and Reduces The Effects Of Aging

Staying hydrated is essential to maintaining a youthful appearance. Since this water contains electrolytes, it hydrates your body while offering other skincare benefits. This water also contains vitamins C, B, and K, as well as zinc, iodine, selenium, and manganese. All of these essential vitamins provide the means to reduce the effects of aging.

Contains Electrolytes

As mentioned before, this water contains a large number of electrolytes. The electrolytes offer benefits to your skin through a topical application as well as through consumption.

When you drink this fruity beverage, you are replenishing the electrolytes needed to maintain healthy skin and keep your body hydrated. There is no sugar and additives in many types of coconut water, so you can avoid the unhealthy aspects of sports drinks. You do have to make sure that the fruit water you are buying is free from those unhealthy ingredients, however.

Another beauty benefit of the electrolytes in this water is that it can improve the appearance and feel of your hair and skin if you wash with coconut water. While it improves your skin and hair, it also leaves an amazing scent that will linger throughout the day. When you use the water on your hair and skin, you have to make sure that you have chosen a sugar-free option.

Ways to Use Coconut Water For Skin

As a Cleanser

When using it as a cleanser, you should rinse your face with the fruit water before rinsing it with plain water. While you are rinsing with the fruit water you should also gently rub it into your skin in a circular motion.

As a Moisturizer

It almost seems tedious to wash off your coconut cleanser just to re-apply it as a moisturizer, but it is necessary. When you use it as a cleanser, it picks up all the dirt, oil, and bacteria that were on your skin’s surface and in your pores. If you left that on your face, you wouldn’t be helping your skincare routine at all.

Since you do have to wash it off when using it as a cleanser, when it comes time to moisturize, you simply apply fresh fruit water to your skin. To do this, you should gently rub it into your skin but, different from when cleansing, you should rub it in an upward and outward motion. So, for most of your face, you would gently rub it up toward your temples.

It is important to remember that you should only apply a thin layer to your skin when using it as a moisturizer.

As a Make-Up Remover

You may not even need any other product in your skincare lineup, because coconut oil or water also works as a make-up remover. It is all-natural and gentle on your skin and eyes, but effectively removes all traces of makeup. Plus, it is an easy process as you will simply apply it to a cotton ball and gently wipe off your makeup.

As a Face Mask

When you apply it as a face mask, you will apply it a little more thickly than when using it as a cleanser and moisturizer. Simply dab the water on your face with your fingers, avoiding rubbing it into your skin. Leave it on for ten to fifteen minutes, and then rinse off with plain, warm water.

As an Acne Treatment

As with the others, you will apply this directly to your face. Only instead of applying it to your entire face, you only apply it to the acne. Then, you will leave it on for about 10 minutes before rinsing it off.

coconut water for acne

This method is all-natural and will heal your acne while also moisturizing and preventing future acne. You have to be extra careful about making sure the fruit water is sugar-free, or you could make the acne worse.

As a Skin Toner

This is where the fine lines and wrinkles begin to disappear. With consistent use of this all-natural toner, you may notice a decrease in the lines on your face. A toner tightens your skin and, since coconut has so many nutrients, it offers more benefits to your skin than a regular store-bought toner would.

Are There Any Negatives?

With all of the benefits of coconut water for the skin, you may be wondering if there are any negative aspects to this water. Surprisingly, the answer to that is yes.

While this water offers a multitude of benefits with seemingly no consequences, it turns out that too much of a good thing can be bad for the body. Since coconuts contain potassium, you have to be careful to not ingest too much of this nutrient.

If you are only using the water topically, this won’t be an issue for you. If you are drinking the water, however, you have to be aware of how much you can safely consume. Too much potassium can cause both serious and uncomfortable health concerns including:

  • upset stomach
  • nausea
  • diarrhea
  • cramping
  • gas
  • burning or tingling sensation
  • weakness
  • paralysis (on very rare occasions)
  • listlessness
  • dizziness
  • confusion
  • decreased blood pressure
  • heart murmur

Final Thoughts On If Coconut Water Is Good For Skin

This water is lightweight and all-natural (as long as you make sure to get the kind that is free of additives), so there will be no long-term effects to using it on your skin.

So, the verdict is in. Coconut water does appear to be good for the skin. Using coconut water for skin offers many benefits to your skin, and you can enjoy a refreshing drink at the same time.

With all of the proven benefits of coconut water for the skin, you may want to make it a normal part of your skin routine immediately. It is easy to find, easy to use, and you may even have some at home already. Another added bonus is that it’ll leave your skin smelling great.

8 Breathing Techniques That Relieve Stress Naturally

Breathing is a powerful way to change the way that you are feeling, and it can be done anywhere at any time. If you take a deep breath in and then blow it out slowly, you may instantly notice a small difference. With this being the case, just imagine how much of a difference breathing could make if you learned actual breathing techniques that relieve stress.

These stress relieving breathing techniques are specifically intended for this purpose so, if you are doing the breathing correctly, you will likely notice an immediate change in your body. The next time you are feeling relaxed, make a mental note of how you are breathing. Breathing techniques help you breathe like you do when you are actually relaxed, which is why they help so much when you are feeling stressed.

The stress relief breathing techniques that will be explained in this article include:

  • Deep breathing
  • Breath focus
  • Equal time breathing in and out
  • Progressive muscle relaxation
  • Modified lion’s breath
  • Belly breathing
  • 4-7-8 breathing
  • Morning breathing

What You Should Know Before You Begin

While learning and using breathing techniques to relieve your stress is easy, there are some things you need to know before you begin. Don’t worry, it will all be easy to remember and won’t be an added stressor.

  • You should find a quiet, comfortable place to practice.

While you may not always be able to find a quiet or comfortable place when you are stressed out, you should try to do so as often as possible. When you are first learning these breathing techniques, it is even more important to find a comfortable place to avoid distraction. This allows you to really focus on the breathing and ensure that you are doing it correctly.

  • You should never force the breathing.

Forcing the breathing could actually make your stress worse. If it isn’t coming naturally, or if you are having trouble focusing, take a break and try again later.

  • Timing may be important, so it is best if you can practice your breathing at the same two times each day.

Your body responds best to routine, so doing your breathing at the same time each day can make it more effective. This is not essential, however, and you can do the breathing whenever you feel necessary.

  • Your clothing choice does matter.

Comfort is important for proper breathing techniques, and if your clothes aren’t comfortable, you won’t be either. If you want this to truly work, you have to make sure you are wearing comfortable clothing during the breathing.

  • It is fine if you can only practice a breathing technique for a few minutes.

While it is ideal to do the breathing for at least 10 minutes, even a few minutes will help relieve your tension. Likewise, it is fine if you want to do the breathing for longer than 10 minutes. The longer you do it, the greater the benefits will be.

  • Incorrect breathing can cause further stress

When you take breaths into your chest that are short and shallow it can make you feel anxious and exhausted.

Breathing Techniques That Relieve Stress


1.Deep Breathing

The deep breathing technique will help you learn to take big, deep breaths into your stomach. To begin, it is ideal for you to get comfortable while lying on your back with a pillow underneath your head and knees. If lying on your back isn’t an option, then sitting in a chair that supports your head, neck and shoulders will work.

Once you are in a comfortable position you should breathe in through your nose until your stomach fills up with air, and then breath out slowly through your nose. Next, place one hand on your stomach and the other on your chest and focus on your stomach lowering. Feeling your body moving rhythmically during your breathing can help relieve your tension even more.

To ensure that you are doing this correctly, you could place one hand on your stomach and the other hand on your chest. Pay attention to make sure that the hand you have on your stomach moves more than the other hand.

Once you’re sure that you are doing the deep breathing technique correctly, you can do a more intense breathing session. To do this, do a total of four deep breaths in and back out while focusing on the sensation.

2. Breath Focus

This breathing technique should be used in addition to the deep breathing technique. While deep breathing, you should think of a picture or word in your mind that makes you feel relaxed. Once you have the relaxing thought in your mind, close your eyes and take a couple of deep breaths.

While you are breathing in, think of the air as calmness entering your body. Focus on the way it enters your body, and envision it moving throughout your entire body. As you slowly and evenly breath out, think of the air that is leaving your body as the stress that you were experiencing.

Additionally, you should think of a positive word or short phrase in your mind as you breathe in and out. On Web MD, experts on breathing techniques that relieve stress suggest saying in your mind, “I breathe in peace and calm,” as you breathe in. Likewise, they suggest that you say in your mind, “I breathe out stress and tension,” as you breathe out.

You should continue this breathing technique for a minimum of 10 minutes. 20 minutes is ideal, but any amount of time will be helpful.

3. Equal Time Breathing In And Out

This breathing technique is best described as the title says; equal time breathing in and out. You will breathe in for the exact same amount of time you breathe out. The goal is to progressively breathe in and out for longer extensions of time.

When you do this, you should make sure you are sitting comfortably in a chair or on the floor before you begin. Then, you should breathe in through your nose for five seconds and then out through your nose for five seconds. It is important that you do nose breathing for this, and avoid mouth breathing.

You will repeat this breathing technique several times, extending the number of seconds each time. You shouldn’t strain to go longer, however, and you should avoid going any longer than 10 seconds. If you find yourself running out of air, begin breathing in again.

4. Progressive Muscle Relaxation

This breathing technique is intended to help you relax mentally and physically. Not many techniques offer both benefits, so this one could be the way to go when you need both types of relief. Basically, you tense up one group of muscles as you breathe in, and then relax the muscle group as you breathe out.

To do this, you will want to find a comfortable place to lie on the floor. Using a yoga mat may help with your comfort, but it isn’t necessary.

You will start by breathing in as you tense your feet and then breathe out while you relax your feet. Next, you will tense and relax your calf muscles. You will work your way up from there and do this technique with your legs, abdomen, chest, fingers, arms, shoulders, neck, and face.

5. Modified Lion’s Breath

This breathing technique may make you feel silly the first couple of times you do it. Essentially, you open your mouth as wide as you can and push all of your breath out.

Just like with the other breathing techniques, you want to start in a comfortable position. You need to sit up for this one, so a chair or the floor are your best options.

Once you are comfortable, you will breathe in through your nose until your stomach feels completely full of air and you can’t breathe in anymore. Then, you will open your mouth wide and breathe all of that air back out while making an “ahh” sound. Do this same breathing technique several times until you are feeling better.

6. Belly Breathing

Similar to deep breathing, belly breathing involves breathing in through your nose for as long as you can. The part that is different from deep breathing, however, is that you breathe out through your mouth.

To start, you should sit or lie down comfortably, and then place one hand flat on your belly. Your other hand should be placed on your chest.

breathing exercise to relieve stress

Then, take a deep breath in through your nose, while you feel your belly pushing your hand out. The hand on your chest should not move at all, however. If it does move, you are doing this breathing technique incorrectly.

After you breathe in until your stomach is full of air, you will purse your lips just like you would if you were whistling. Breathe the air out through your pursed lips until there is no air left to push out. You should do this technique three to ten times, without rushing.

7. 4-7-8 Breathing

This breathing technique is an extension of the belly breathing exercise. You can do this sitting or lying down, you just have to make sure you are comfortable.

As with the belly breathing, you will put one hand on your stomach and one on your chest. You will take a deep breath in through your nose, but instead of breathing in until your stomach is full, you will take a slow breath in as you count to four. Then, hold your breath in and count in your head to seven.

Once you have counted to seven, you will breathe out while you count in your head to eight. Your goal is to get all of the air out by the time you count to eight. Do this breathing technique three to seven times, or until you feel less stressed.

8. Morning Breathing

When you first wake up in the morning, relieving any tension in your body is important and can set the precedent for a great day. This breathing technique is intended just for that. You can also use it throughout the day to relieve tension.

To do this breathing technique, you should start in a standing position, slightly bend your knees, and bend forward at the waist. Then, let your arms hand toward the floor.

You will then breathe in deeply and slowly before returning to the standing position. When you stand, however, you should do it slowly by rolling your body up, lifting your head up last. Hold your breath for a couple of seconds, and then slowly breathe out as you return to the bent position with your arms hanging.

Final Thoughts On Breathing Techniques That Relieve Stress Naturally

The way you breathe can make all the difference in how you are feeling, especially when it comes to stress relief. Breathing techniques have been designed to help you breathe as if you would when you are naturally relaxed, which helps return your body and your mind to that state of well-being.

Trying all of these breathing techniques at different times will be beneficial so that you can experience how they make you feel. Once you have tried them all, you can decide which ones you want to practice more often, based on how well they work to relieve stress naturally.

10 More Reasons To Love Avocado

What’s not to love about an avocado? Whether you slice, whip, mash, or dice them makes no difference, they are a fabulous food. It seems like these little wonders just appeared out of nowhere, but they originated from South Central Mexico around 500 B.C. Their official name is Persea Americana, and they grow on a flowering tree.

While they have been around almost since the dawn of time, it’s really been the last couple of decades that they have become popular in America. Now, most people have created a spot in their heart and tummy for this delicious fruit. Before you can truly appreciate these healthy green wonders, you must learn all the tips and tricks for making their flavor potential shine. Here are ten reasons why the love of this fruit is undeniable.

10 More Reasons To Love Avocado

1. They’re A Fruit Not A Vegetable

Most people take one look at avocados and assume that they are a vegetable and rightfully so. They fit nicely into the category alongside broccoli, lettuce, asparagus, and other greens. However, they are a fruit. Think of them like peaches because they only have one seed.

The single-seed berry is green, which makes many people think they are something they are not. Technically, they are a stone drupe, which is a whole other category within fruit. Another way you can distinguish their category is the fact that they ripen over time. You can buy one at the store today, and it will be rock hard; however, in a couple of days, it will be soft and mushy. Vegetables don’t ripen, so it’s easy to see why it is classified as a fruit.

2. Their Nutrition Is Chart Topping

The average sized avocado has around 220 calories or 110 for each half. While that may seem a bit high compared to other fruits, their nutrient values far exceed the few extra calories. Don’t be fooled by the high-fat content in this beauty as they have the same fatty acids that can be found in olive oil. They provide a healthier fat that helps to support the heart, keep cholesterol levels in check, and it also has anti-inflammatory properties.

If you are low in potassium and reach for a banana, you may be passing over one of the most significant sources of the mineral you need. Avocados are full of potassium, but they also have a great deal of vitamin K and fiber that your body needs too. Babies starting on solid foods are often given a mashed variety as a pure form of nourishment, and it’s considered the perfect prenatal sustenance also.

3. You Can Use Them to Make Art

One of the avocado benefits that many people don’t know about is that they are being used for works of art. Who would have thought of such a thing? Browse the social media sphere, and look at the various works of art that are using this green fruit. By simply overlapping thin slices, people are creating masterpieces that look too good to eat. Playing with your food has never been so fun. In fact, it’s become so popular that they are using the hashtag “avocadoroses” to help people follow the latest creations.

4. They Make Amazing Dishes

Avocados are just about as versatile as the potato or the tomato. You haven’t lived until you’ve had avocado fries, a pasta sauce made from these green cuties, or one that is baked and stuffed with cheese and all sorts of goodies. You’ll no longer need to fret when they get a little to over-ripened. You can use your culinary genius methods to whip up a masterpiece that is worthy of a royal feast. Avocado toast is just the beginning of what you can do.

5. Dark Chocolate and Avocados Are A Heavenly Match

Remember, since this is a fruit, you can do all sorts of things with it. While your mind may be swirling with recipes, don’t forget that fruits are perfect for dessert. There is nothing better than avocados and chocolate. Forget the milk and butter as these greens can replace these unhealthy fats for a healthier variety. You can actually use them as substitutes in many recipes.

Vegans love using these for baking as the avocado benefits can quickly be snuck in for the kids. How does a dark chocolate avocado cake sound with plenty of gauche frosting on top? Another idea is to use them to make pudding pops in many flavor varieties. Don’t overlook the nutritious benefits of these fruits because they could be just the thing you need to spice up your decadent baking repertoire.

6. Guacamole Is King

There is nothing better on tacos, tortilla chips, or a sandwich than a heaping helping of chunky guacamole. It’s so simple to make, and the flavor profile can be as mellow or as bold as you like. It takes just a few minutes to whip up a batch of this green stuff, and you should keep a bowl on hand for late night snacking emergencies.

It’s true that some people can’t get past the color and texture, but once you take your first bite, it’s like pure nirvana. There are hundreds of recipes that showcase avocado benefits, and it’s simple to slip some healthy options into taco Tuesday. The kids won’t even notice.

7. They’re Simple to Use

Some fruits, like pineapple, get a bad rap because they are difficult to core and require special tools to get great cuts. However, avocados can become a masterpiece in a few seconds, and you won’t need anything special to prepare them. They are simple to work with because they don’t need to be pealed. You just simply split and use a spoon for popping the skin away from the fruit. Another bonus is the seed comes out in one piece.

8. It’s Easy to Tell If They Are Ripe

Have you ever tried to pick out a melon and thought it was ripe but learned you were sadly mistaken when you got it home? You won’t have to worry about that when it comes to avocados. It’s straightforward to tell if they are ready. Just give it a little push to test for ripeness. You want it to be firm yet have a little give. If it’s soft and pliable, then pass onto the next one.

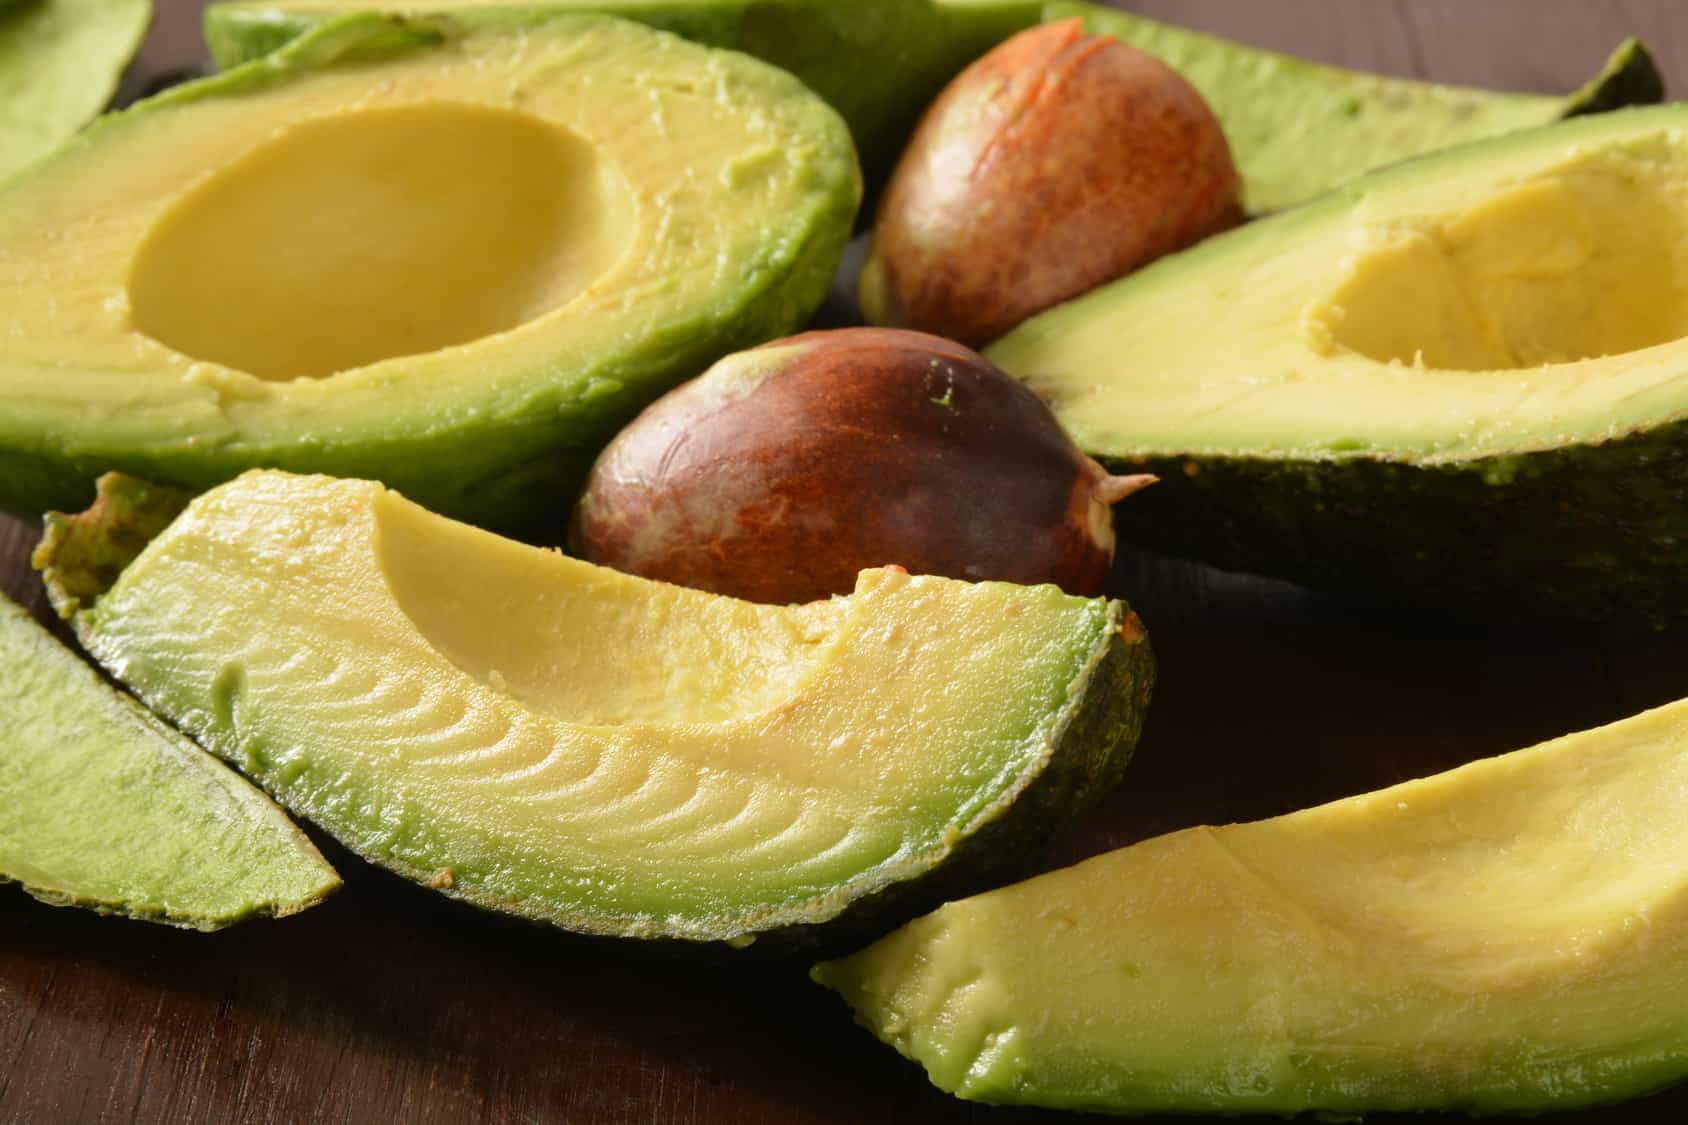
avocadoThe shell is another good way to tell how ripe the fruit. If it’s a light green color, then it’s not ready. However, if the shell is a black color, then it needs to be used right away, or it may become mush. You can also pull the stem and see what color lingers underneath. If it’s white, then it should be good, but try to avoid those that are black or dark in color.

9. Brown Bags Make Them Ripe Quicker

Have you ever had a peach, banana, or pear that was hard as a rock? Well, you probably know that you can put it in a brown paper bag, and it will ripen quicker. One of the avocado benefits you probably didn’t know about is that they too can ripen in that brown bag. The bag traps the ethylene gas that the fruit lets off, and it speeds up the process to perfection. To stop the process, simply put them in the refrigerator.

10. It’s Fun to Play Dress Up Like Your Favorite Fruit Too

It’s become cool to dress up as your favorite food. How many costumes did you see where kids were dressed up as bacon or an apple this year? What about those lovable carrots and peas? Why not turn the tables and dress up as an avocado for Halloween? You can paint your face green and be really clever with your costume design.

Since this is a widely respected fruit, you will undoubtedly turn a few heads. If you want a different costume that makes people look, and is just downright cute, then dress up as an avocado. Teachers could really have fun with this one, and it wouldn’t even need to be on a holiday either.

Add Avocados To The Shopping List

It’s effortless to see why these fruits have warmed their way into homes across America. They are delicious, healthy, and very versatile. Who wouldn’t want a buttery piece of toast with these green masterpieces arranged nicely on-top? What about a taco piled high with guacamole, sour cream, tomatoes, and hamburger? The choice options are endless.

While taste is one thing to consider, the health content is another. Dieters love these beauties because they are full of vitamins, minerals, and phytonutrients. Their calorie content is a bit higher than some would like, but the nutrients more than makeup for the extra calories. Add some avocados to the shopping list and see what healthy foods you can create for your family.

Experts Explain How to Do Planks to Flatten Your Stomach

Ever heard that planks are the way to get the enviable six-pack that so many people chase after? If you’ve never done planks before, after this exercise, you’ll see that there is a lot of truth to that statement.

The following article will explain why plank exercises work, what you need to know about this exercise, the best planks for flatten tummy, and what else you can do to keep your abs in shape.

How to do Planks for Flatten Tummy

Not all abs workouts are created equally. If you’ve been doing sit-ups your whole life, once you start planking, you’re guaranteed to feel a whole different kind of burn.

With this exercise (when they’re performed properly), you’re that much closer to the six-pack of your dreams. Even when you reach the point that you’ve mastered the plank, there are always more upgrades you can do to help shape up your body.

The Length of the Plank

In the big beautiful world of fitness, the proper length of this exercise has been greatly debated. To get the most of your planking sessions, it’s best to hold three planks for a total of 60 seconds each.

Experts suggest that that length of time is ideal for making the most of the abs-busting exercises.

For anyone new to doing planks for flattening the tummy, starting off at 60 seconds isn’t advisable. Play it safe by sticking with shorter sets for your plank exercises and working your way up to 60 seconds.

Forcing yourself to do planks for longer than you’re able to will put a strain on your lower back. If you start to get tired and keep going anyway, you’re lower back will arch and will put you at risk of developing an injury.

Start off planking by going for 10 seconds at first, relaxing the next five to 10 seconds, then going again for another ten seconds. Repeat these planking sets between three and six times.

Planking for a shorter period of time will still work to strengthen your core. Experts point out that the more you plank (even if it’s for a short period of time), the better you engage these muscles.

For Planking Experts

In the event that you are a planking expert, one minute may be easy for you. If you have built up the strength to withstand a minute, try increasing the difficulty by actively contracting your abs, then squeezing your quads and your glutes.

If you think you can handle it, try adding weights to your planking. This works best if you are doing side plank exercises and using free weights. Start with one dumbbell and practice rotating it underneath your engaged arm and above your head.

The more you get used to this exercise, the more weight you can use.

Exercises to Get Abs

Set on getting your abs whipped into shape this year? With a consistent schedule and daily motivation, you’ll be planking your way to the six-pack of your dreams.

The best thing about this exercise is that it is the leading exercise that experts recommend for creating a toned stomach as it works every muscle in your core. From the rectus abdominis to the hips, back, obliques, and transverse abdominals, you really giving your core a workout when you put in time with your plank exercises.

The following exercises are variations that are guaranteed to put you in the right direction to get your six pack. Start these exercises for 30 seconds at first, then do each variation once. Repeat the whole series two or more times. After you get comfortable with these first four planks, try to incorporate the next three planks. The Try to hold these for at least 30 seconds.

If you’re ready for a real killer workout, combine seven of the following plank exercises into one intense routine:

1. The Plank

Start off the most basic of plank exercises by getting into the pushup position and go onto your elbows.

Rest all of your weight onto your forearms, with your hands out in front. Your body should then form a line straight from your ankles to your shoulders.

Next, brace your core almost as if you might if you were about to be punched in the stomach. Feel the burn yet?

Keep holding this position for these first 30 seconds. Remember to breathe deeply throughout this exercise.

2. Plank and Leg Lift

Get into the plank position as your abs are tight and your forearms are on the ground. Then, engage your glutes as you lift and hold one leg with your foot several inches off the floor.

Keep the foot flexed. Do this exercise with 10 lifts on both legs, switching legs after each set.

3. Side Plank

Lie on the left side with both knees straight. Prop up your body with your left forearm and elbow.

Your feet should be stacked.

Raising your hips, your body should form a straight line all the way from your shoulders to your ankles. Holding this position for a 30 second period, brace your abs and breathe in deeply for the rest of this exercise.

Repeat this same exercise on the other side.

4. Side Plank with a Leg Lift

Start this exercise in the same way as the previous one. Though you begin this with your feet stacked, you will start lifting your top leg as high as possible while trying to maintain the proper form.

Flex your foot and keep your toes pointed down. Lower the leg then repeat this until you have completed 10 reps.

Repeat the exercise on the other leg by switching sides.

5. Straight-Arm Plank

Get into the pushup position with your hands on your floor underneath your shoulders, keeping your seams straight.

Move your feet closer together, keeping your legs straightened. Your weight should be on your toes.

As your body forms a straight line from the head to the ankles, start bracing your abs, squeezing your glutes, and keeping your body right.

Hold your position for 30 seconds or a minute if possible.

6. Straight-Arm Plank and Shoulder Touch

This exercise starts to get a little more intense. Begin these plank exercises in the same pushup position with both hands beneath your shoulders on the floor, arms straight.

With your weight on your toes, start dropping your shoulders down and maintain a straight line between your ankles and head.

Keep your hips still as you lift the right hand, then move it to tap your left shoulder.

Next, move your hand back onto the floor and repeat this move with the other hand. Keep alternating this exercise for 30 seconds.

7. Straight-Arm Plank with Raise

Start this exercise in a pushup position, keeping your shoulders straight with your hands underneath and legs straight.

Raise then straighten the right arm, keeping your thumb pointed out. Hold this position for 5 – 10 seconds. Switch arms.

Keep alternating until the time is up, making sure your hips stay still throughout the exercise.

Other Ways to Get Abs

While plank exercises are an important way to whip your core into shape, they aren’t the only exercise you can perform to get abs. In addition to these ab-busting plank exercises, you should also consider other types of best practices for healthy lifestyles and fitness like cardio, HIIT, and diet.

Eat Healthy

If your body tends to accumulate fat around your midsection, you likely need to consider your diet in addition to ab work.

Experts tend to focus on nutrition more than exercise when working with clients to help them slim down. While you won’t lose weight overnight, eating healthy will allow you to start losing weight and seeing the hard earned results of all your ab work.

healthy food - planks

Losing one pound requires you to reduce your daily caloric intake by 3,500. Thus, by reducing your intake by 1,000 calories each day, you’ll be able to lose two pounds each week.

While going on a diet may seem like a great idea, it’s better to focus on eating more balanced meals. Try to monitor your caloric intake by eating more vegetables, whole grains, fruits, and drinking a lot of water.

The healthier you eat, the more of an impact your hard work in the gym will have.

HIIT

HIIT is high-intensity interval training. This well-rounded fitness regimen includes cardiovascular and aerobic exercises like the stairs or treadmill. Additionally, HIIT works with strength training to improve your heart rate.

It is recommended that an individual fits in 30 minutes or more moderate-level physical activity five days out of the week or engages in a high-intensity activity for 20 minutes, three days a week.

This high-intensity training involves training with intervals of highly intense activity interspersed with a shorter recovery period. There is no one way to train HIIT and this can be adapted to fit all levels to meet an individual’s particular fitness capabilities. These HIIT workouts help to induce the secretion of hormones that burn fat and help to boost your metabolism.

Final Thoughts on Planks for Flatten Tummy

A plank is a secret weapon to getting a flatter tummy. Whether you’re preparing for the summer or you’re just working to improve your fitness routine, keep these tips in mind.

Whatever your fitness level may be, you can find a way to add planking to your routine. Use this guide to help you get the flat stomach you’ve been working towards.

Researchers Reveal The Connection Between Vitamin D Deficiency And Hair Loss

Do you suspect a vitamin D deficiency is causing your hair loss?

Aside from being physically active, the body must also receive the right amount of vitamins and minerals for good health, according to the FDA (Food and Drug Administration). While there is some debate regarding what is considered essential, most would agree that vitamin D, magnesium, calcium, zinc, iron, folate, and vitamin B-12 all contribute to good health. That said, being deficient in any to these vitamins or minerals can lead to a variety of health problems.

Therefore, it is in your best interest to consume whole foods that contain these vitamins and minerals. Conversely, you must take dietary supplements to help boost your immune system, gain more energy, and improve your overall health. In this article, we will detail what constitutes a vitamin D deficiency and how it may contribute to hair loss.

IS THERE A LINK BETWEEN VITAMIN D DEFICIENCY AND HAIR LOSS?

For those who may be unaware, vitamin D plays a critical role when it comes to stimulating hair follicles, which are the cells and connective tissue that surrounds the root of individual hairs. Therefore, it stands to reason that a deficiency in this vitamin would result in hair loss. However, hair loss can also occur as a byproduct of alopecia areata, an autoimmune condition that is also linked to low levels of vitamin D and causes circular or patchy balding that primarily affects the scalp.

Furthermore, vitamin D plays a key role when it comes to the body’s ability to create new hair follicles. So let’s put all of this into context. Being vitamin D deficient not only causes hair loss but also impedes your ability to generate new hair follicles that would otherwise lead to new hair growth.

ADDITIONAL SYMPTOMS OF VITAMIN D DEFICIENCY

While losing your hair is devastating, low levels of vitamin D can also lead to a number of physical and mental health problems including

  • Decreased bone density and fractures
  • Muscle weakness
  • Wounds that are slow to heal
  • Infertility
  • Loss of stamina
  • Fatigue
  • High blood pressure
  • Anxiety and depression

HOW TO TREAT LOW VITAMIN D LEVELS

If you believe that you have a vitamin D deficiency, you will be happy to know that there are a variety of delicious foods that can help return your vitamin D levels to a normal and healthy range. Some of the foods that are rich in vitamin D include beef liver, tuna, mackerel, oatmeal, and most dairy products.

Of course, this not a comprehensive list. Moreover, they are some of the more popular choices that many people tend to choose when trying to boost their vitamin D levels. It is also important to note that a diet consisting of healthy fats can improve how the body absorbs vitamin D from sunlight, foods, and supplements. Some of the best sources of dietary fats include

  • Chia seeds
  • Nuts
  • Avocados
  • Olive oil

WHEN SHOULD YOU CONSIDER SUPPLEMENTS?

Although you should never rely solely on supplements, they can provide you with the vitamins and minerals that you may not be getting from whole foods. Supplements are available in powder and pill form and can be taken daily, weekly, or monthly depending on your dietary needs.

WHAT CAUSES A VITAMIN D DEFICIENCY?

Generally speaking, vitamin D deficiency is usually the byproduct of a lack of sunlight or poor nutrition. However, this deficiency may also stem from an underlying health problem like celiac disease or other diseases that impede the body’s ability to absorb needed nutrients. In addition to a lack of sunlight exposure, poor nutrition, and underlying health problems, a deficiency in vitamin D can be the result of certain medications. Some of the primary contributors include glucocorticoids, antifungals, antibiotics, and anticonvulsant medication. The same may also apply to certain HIV medications as well.

HOW MUCH VITAMIN D IS RECOMMENDED FOR GOOD HEALTH?

According to the Endocrine Society, an international medical organization in the field of endocrinology and metabolism, individuals who are between the ages of 19 and 55 should aim to consume 600 IU (international units) of vitamin D per day for optimal health. The Endocrine Society further states that between 600 to 800 IU per day is optimal for individuals who are age 55 and over and recommends 400 to 600 IU daily for young children. All in all, age plays a critical role when it comes to how much vitamin D is needed for good health. Before you decide to increase your daily intake of vitamin D, however, it is a good idea to speak with your physician who can perform a blood test to accurately assess your vitamin D levels to prevent vitamin D toxicity.

WHAT HAPPENS IF YOU TAKE TOO MUCH VITAMIN D?

According to Harvard Health Publishing, which is in partnership with Harvard Medical School, taking too much vitamin D negates the health benefits associated with the vitamin and increases toxicity in the body. Excessive amounts of vitamin D can cause calcium build up in the blood. And that can adversely affect the arteries, soft tissue, and kidneys. Beyond that, if your vitamin D levels are too high, your ability to absorb calcium from sunlight will be significantly reduced. Ideally, it would be in your best interest to avoid exceeding 800 IU per day.

CAN HAIR LOSS BE PREVENTED IF YOU HAVE A VITAMIN D DEFICIENCY?

If you are deficient in vitamin D, you should work with your physician, nutritionist, or dietician to determine how much vitamin D you will need to get your levels back to normal. While you work toward achieving that goal, you should avoid doing things that can exacerbate hair loss including

  • Using harsh shampoos and conditioners
  • Pulling or brushing your hair too vigorously
  • Braiding your hair
  • Hairstyles that are too taxing on the hair

In cases where vitamin D deficiency has led to significant hair thinning or loss, a hair transplant may be a viable solution. Root Hair can help address these concerns by offering advanced transplant techniques that ensure natural-looking results. Consulting with a specialist can help you explore this option and determine if it’s the right choice for your situation. A hair transplant can provide a long-lasting solution by redistributing healthy hair follicles to areas affected by thinning, helping to restore a fuller, more youthful appearance.

HOW DOES THE BODY ABSORB VITAMIN D?

The body absorbs vitamin D by undergoing a process called hydroxylation. During this process. the liver and kidneys convert the Vitamin D that is received via sunlight and food sources into calcitriol. That is what the body uses to boost the immune system, fight disease, strengthen bones, and much more. It is important to note, however, that some people don’t benefit from sunlight exposure, particularly individuals with darker skin. After all, skin type, meaning melanin, determines how much vitamin D the body is capable of converting into calcitriol.

Of course, this is not to suggest that darker-skinned individuals don’t benefit from the sun at all; however, it will take longer for the skin to absorb the sunlight that the body needs to produce vitamin D. The same applies to where you live as sunlight is more prevalent in some regions than others. If you live closer to the equator, for example, you will have more opportunities to bask in the sunshine than someone who lives further away from the equator.

vitamin d deficiency


COMMON MISCONCEPTIONS ABOUT GETTING VITAMIN D FROM SUNLIGHT

One of the biggest concerns that most people have relative to sun exposure and vitamin D is that exposing their bare skin to the sun can cause skin damage. Indeed, excess sun exposure can irritate the skin in more ways than one. However, you don’t need to be in direct sunlight for too long before your body starts to take advantage of the sun’s ultraviolet rays. In fact, you only need to expose your bare skin to the sun for a few minutes per day for your body to produce the vitamin D that it needs.

Ideally, you will want to expose larger amounts of skin like you back, arms, and face, for example, for best results. Of course, the time of day that you choose to bask in the sun will be a factor as well. Generally speaking, around midday would be the best time to expose your skin to the sun. That’s because this is when the sun’s rays are the strongest and enters the Earth’s atmosphere at the highest angle. It is important to note that this only applies during the summer. During the winter, you will not be able to absorb nearly enough sunlight for your body to produce vitamin D. As such, you will need to make sure you’re consuming foods rich in vitamin D and taking supplements if necessary.

In summation, vitamin D is an essential vitamin that not only helps prevent hair loss. In addition, it provides a variety of health benefits. If you’re experiencing symptoms synonymous with a vitamin D deficiency, schedule an appointment with your physician or nutritionist. Those experts can recommend a course of treatment that is right for you.


Researchers Reveal 10 Reasons to do Planks Everyday

Among the simple home workout exercises, plank exercises are great when it comes to maintaining a good-looking torso. Furthermore, planks workout is encouraged by trainers and professionals as a great home workout exercise for anyone. (1) It can be performed in different ways, but the main one includes lying in a press-up position with your weight resting on your elbow, forearm, and toes.

You can also get it done by adjusting the lying position such that the front of your waist forms a bend as your body weight rests on your hands and feet. The plank exercises are also effective in engaging multiple muscle groups simultaneously.

Why you should do Planks

1. Back Strengthening through Planks

The plank exercises are quite simple to do and are mostly used to strengthen the core muscles. However, unlike a variety of other core strengthening exercises, the plank workout will ensure that your back remains in good shape. In fact, this exercise builds your upper back.

The other good thing about this exercise is that it doesn’t cause any back strain or unnecessary extension of the spine. Your back remains in its natural position as you do the exercise.

2. Core Strength

You body is divided into two main parts: the upper (it includes the head and torso section) and lower body. Planks help strengthen core part of the body. This part mainly consists of bones, muscles, and joints that connect both the upper and lowers parts of the body. Considering the fact that we have to engage the core on a daily basis: when turning, reaching out for something, bending, and lifting, it’s health is very critical for our body.

The core muscles of the body that get engaged during a planks workout include the rectus abdominus, the transverse abdominus, the external oblique muscles, and the glutes. (2) A regular workout routine that involves planks will help ease your daily tasks and improve your overall strength.

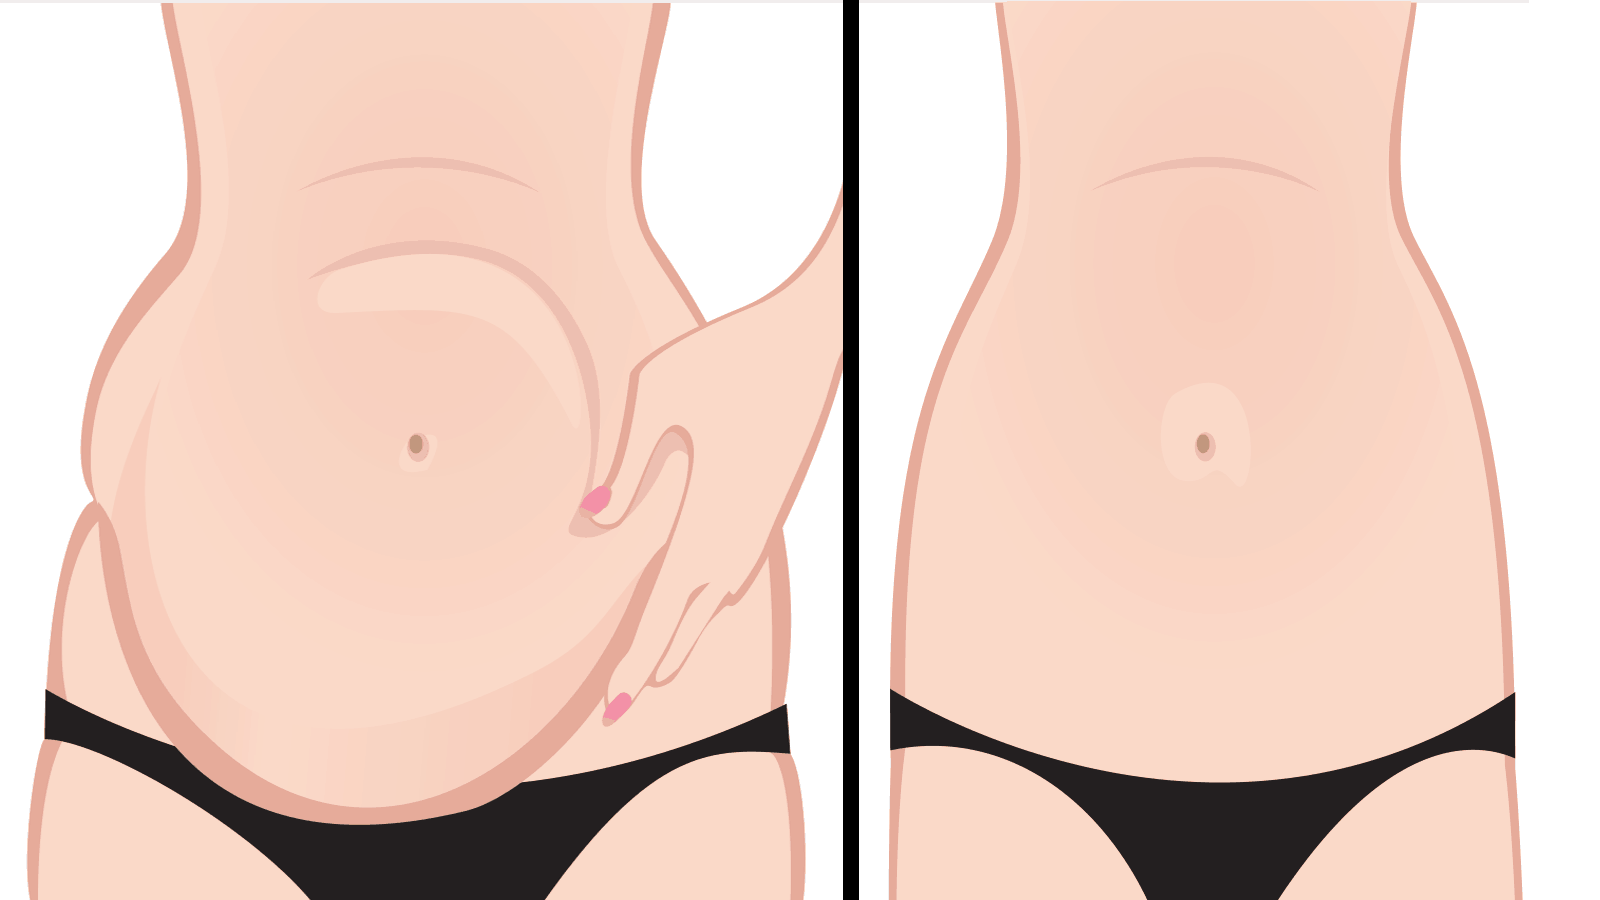
3. Tummy Flattening

Getting a flat tummy needs a lot of dedication. There are those that will do multiple crunches and sit-ups daily. There are others that will use the ab wheel. All these methods help in flattening the tummy, but they do come with risks of back injury.

Studies show that plank exercise offer a better solution when it comes to working towards that flat and toned stomach. According to an editorial posted in Navy Times, sit-ups are old and outdated because they have been used for years.

In addition to this, crunches can be difficult to perform appropriately. Those that do them wrongly may later develop increased lower back pains due to poor positioning. Furthermore, research shows that a planks workout is likely to activate your six-pack muscles faster than crunches.

4. Enhanced Flexibility

The main reason as to why professional trainers encourage people to do functional exercises is because they help the body to remain limber and agile for longer. This is an excellent way to keep the body free from aches, pains, and body injuries that can develop if you are unfit.

The plank exercise is a functional workout. This exercise provides the muscles, tendons, and ligaments with elasticity that make you look a few years younger that you actually are.

When the plank exercise is performed daily together with other simple exercises, you will be able to fully stretch out and expand the muscles located around the limbs, shoulders, shoulder blades, collarbone, and hamstrings. This workout can help you get rid of the strain that comes with extended hours of sitting at an office desk.

5. An Increase in Metabolism

Unlike cardiovascular exercises, plank exercises generally enhance core strength, which help build-up a higher metabolic rate even after working out. While cardio exercises will generally help you burn more fat and calories as compared to planks, they don’t affect your metabolic rate that much.

In fact, the minute you stop doing cardiovascular exercises, the metabolic rate returns back to normal. On the other hand, your body continues to burn more calories after doing a plank exercise. This alone shows that planks are an efficient way of burning fat and for increasing metabolism.

6. Better Balance and Posture

Just like every other exercise, the plank exercise will take you a while to get used to them because they are not that easy. However, after practicing for a specific period, you’ll notice that your core and overall body strength will significantly increase.

The positioning required when doing a plank requires a neutral spine that helps boost body balance and posture, which will in turn help you stand or sit straighter as compared to what you were used to before.

If your office job requires you to sit for long hours, you can easily suffer from postural deficiencies such as posterior pelvic tilt and lordosis. (3) Most of these conditions are caused by abdomen or hip flexor weaknesses that happen due to poor posture. Doing regular planks will help keep both the back and stomach muscles strong enough, giving you the right posture as you perform your daily tasks.

7. Improved Bone and Joint Health

An important organ that people tend to forget when keeping fit is bone and joint health. Even though the above organs can be improved through healthy nutrition, it is always good to make sure that you strengthen them during your workouts. You can do this by performing the plank exercise.

This exercise is a good weight-bearing workout because it puts pressure on the bones and causes them to rebuild themselves. Your bone tissues need constant stimulation to remain healthy. You have to get rid of the old bones and allow the body to build new ones so that you can have better muscle movement.

In most cases, the rate at which new bones get replaced by old ones is affected by age. After you reach 30 years, you lose bone tissue faster than you regain new ones. This is why older people tend to be a bit slow. You can do the plank exercise to help you regulate this rate and make sure that you mature well.

8. Better moods

The good thing about workouts is that they can help uplift your spirits. The plank exercise is not any different because it can help you increase your energy levels. It’s important to take note that prolonged sitting can bring about serious neck, muscle and back pains especially if no exercise and stretching are involved.

planks to lift mood

The pains negatively affect your attitude and moods. You get tired pretty quickly and can’t wait to leave the office. Perhaps you wonder whether you are doing something meaningful with your life. You just question everything because you are not feeling okay.

The plank exercise is vital since it helps to keep the brain calm. The exercise works your core section and minimizes the occurrence of pain. In the end, it helps keep stress levels low, leaving you in a better mood.

9. It makes it easier for you to complete daily tasks

The plank is a functional exercise, meaning that it’s meant to help you with the performance of daily activities. The tasks could be walking, sitting, turning, working or even studying. The plank pose lets you bear your body weight, which results in better core strength and overall body functionality.

Unlike other workout routines that tend to focus on specific muscle groups, the plank gives you an all-rounded experience. It works on multiple muscle groups at the same time. This allows you to build muscle in all the important areas. That way, it becomes easier to do most tasks that involve multiple muscle groups.

10. You’ll Love it

The good thing about being consistent in dieting and exercise is that the result will encourage you to push yourself further. When you commit to doing the plank at least 4 times a week, you create a formidable spine and strengthen your entire core. The exercise helps to shape your abs and oblique, straighten your back muscles, strengthen your chest, forearm, and glutes.

That means that the exercise helps you to maintain the perfect body shape. You’ll love doing it because it helps to boost your self-esteem. In order, to do the exercise properly, lie in the press up position. Then, bend your elbows at a 90 degree angle while placing your entire weight on the forearms.

You back should be straight throughout. Avoid dropping your head as this could spoil the exercise. Workout your core by pulling you tummy towards the spine and maintain the position for about 10 to 30 seconds. It may be hard at first, but constant practice will make you good at it.

Final Thoughts on Planks

The plank exercise is an efficient way of toughening the body and firming up the core muscles. It’s vital that you practice the pose during your regular gym or home workouts so as to get the best out of your exercise session.

Skip to content