Inspiration to your inbox

11 Simple Stretches For Osteoporosis That Heal Brittle Bones

Over 75 million people in the world suffer from osteoporosis, or brittle bones. It’s a very common condition among women over 40 and it’s difficult to diagnose unless you break a bone due to a minor injury. It can occur in only some areas of the body, or over bigger parts of the body. It can also sometimes cause chronic pain if fractures of the spine occur.

Fractures caused by osteoporosis can significantly impact your life and should be a cause of concern if you are at risk of osteoporosis. Sometimes, fractures can lead to the need for long-term care, or even increase the risk of death. Furthermore, a lack of calcium and vitamin D are also serious risk factors when it comes to osteoporosis.

There may be a solution though. Researchers have discovered that some yoga poses, when performed daily, can positively increase bone density rel=”nofollow” and therefore reduce the risk of osteoporosis. Moreover, yoga is fantastic for other mobility-affecting conditions, such as joint hypermobility and Ehlers-Danlos syndrome. Of course, the best option is to go to a yoga teacher and ask them about the best poses for your condition. However, with some training videos on YouTube and illustrated guides, you can also learn these poses at home! It’s a cost-effective and fun way to reduce your risk of osteoporosis. Here are some yoga poses recommended by science for increased bone strength.

Here Are 11 Simple Stretches for Osteoporosis That Heal Brittle Bones

1. The downward dog

This is one of the most popular yoga poses out there. To perform the downward dog, plant your hands on the ground and lift up your pelvis, strengthening your back and keeping it straight so that your body forms the shape of a V. This pose is great for adding some strength to your spine and preventing fractures of the back.

2. The salabhasana

Also known as the locust, this pose is performed by lifting your head off the ground, with your arms stretched back, and lifting your legs from the pelvis at the same time while lying on your belly. This is a wonderful pose to increase your core strength and the develop the muscles in your back.

3. The straight-leg twist

Another one for the back, the straight-leg twist is a popular solution for anyone struggling with lower back or hip pain. Lie down on your back, with your palms against the floor. Slowly raise your legs, making sure to keep your knees as straight as possible, and then rotate your torso, bringing your feet towards the floor. Alternate sides of this position for the best results.

4. The bridge

Begin on your back, with your legs bent at the knees and your palms and feet against the floor. Slowly lift your pelvis off the ground until your whole torso is in line with your knees. Stay like that for a few seconds and then relax, trying it again. This is wonderful for strengthening your arms and shoulders, as well as increasing your general core strength.

5. Vriksasana

This is more commonly known as the tree pose and is again one of the most common yoga poses. It’s wonderful for the weaker tendons and bones in your body, like your ankles and wrists. Start standing up, with your feet planted on the ground. Raise your right leg and bend at the knee, placing your foot against your other leg. Raise your hands above your head and join them at your palms.

6. The revolved triangle

This pose is very useful for sciatica sufferers, as they are at a greater risk of osteoporosis. It’s also great for relieving lower back pain. Stand up, with your feet apart and your arms parallel to the floor. Rotate your torso and touch one palm to the floor next to your front leg, while your other arm extends upwards. Switch sides for maximum efficiency.

7. The extended triangle

This is very similar to the revolved triangle, only the arm on your front leg rests on your ankle rather than the floor and your hip is slightly extended forward. This pose is really useful for weak joints and tense muscles, known to relieve tension almost straightaway. As with the revolved triangle, make sure to switch sides.

8. The reclining hand-to-big-toe

Also called the Supta Pandagusthasana, this position has two variations, however, the one we’ll describe here is better for yoga beginners. Lie down on the floor, looking up, with your hands by your sides. Raise one of your legs, keeping the knee extended. With your hand, place a rubber band on the sole of the foot, pressing down as hard as you can. Make sure to switch legs as well. This position ensures correct pelvis alignment and relieves lower back pain.

bones

9. The warrior pose

Start with your feet on the floor, arms by your side. Step forward with one foot and lean down, extending your back foot until the knee is completely taut. Raise your hands at shoulder level parallel to the floor with the palms up. Then switch the leading leg. This exercise is great for painful hips and a misaligned pelvis as a result of osteoporosis.

10. The bent-knee twist

This is a slightly more advanced pose that people who are not very flexible might find difficult. Start sitting up, with your back straight, arms by your side. Bend your left leg at the knee and put your right leg over it, twisting your torso to the right. Hook your arms through the right leg and hold your hands together. Switch sides after a few seconds.

11. The deep relaxation pose

Lie down on your back, with palms up to the ceiling. Keep your feet spread apart, your hips relaxed, and your knees extended. Take a deep breath and close your eyes, feeling your tension slip away. Try not to fall asleep. This position relaxes all the pain in your body and your mind, too.

Final thoughts

“Today osteoporosis affects more than 75 million people in the United States, Europe, and Japan and causes more than 2.3 million fractures in the USA and Europe alone.” – Gro Harlem Brundtland

If you’re at risk for osteoporosis, remember positive thinking – you can definitely help yourself with these relaxing yoga poses, and do something fun in the meantime, too!

https://www.youtube.com/watch?v=cHeI3Y_CfMo

How I Cured My Acne With Apple Cider Vinegar In Just 1 Week

Acne breaks out your face and can be very embarrassing sometimes. The blemishes caused by acne can stay on your face for a couple of months and even years. If you have ever had acne, then you must be familiar with how annoying the situation is. The condition subjects you to live with scars on your face for a long time. You could have applied various treatment methods and resources such as medicated creams, drugstore cleansers and dangerous prescription pills all in vain.

I have a very close friend who suffered the effects caused by acne since her puberty through high school and even college. She had tried all the methodologies and applications she had heard, or read of, but there was not even a single one that helped her to remedy her skin. She lived a stressful life. She had also started developing low self-esteem. Luckily, her mother read about the use of apple cider that produces vinegar to cure acne. The mom revealed the hint to her, and since she had suffered enough, she decided to try anything that could free her from acne. She tried it and it, indeed, worked. I decided to find out how apple cider vinegar works, and the following are hints to help you achieve your goal of treating acne.

How apple cider vinegar cured my acne in 1 week:

1. Buy your apple cider vinegar

When you go out to purchase an apple cider vinegar, ensure that it is unfiltered, organic, unpasteurized and it contains the ‘mother.’ The Mother is the brown strand that floats in the vinegar and is beneficial for your health.

2. Put a small portion of apple cider vinegar into a glass container

The amount of apple cider vinegar that you should use depends on the size of toner you need to prepare. However, I recommend that you start by making smaller portions of about a teaspoon. You should then increase the amount with time as you get used to it.

3. Use distilled or filtered water to dilute the apple cider vinegar for acne

Your skin sensitivity will determine the amount of water you should use to dilute the substance. Consider diluting it in the ratio of one portion of the content to about two or three equal parts of water. If your skin is sensitive, then you should add some more water to have a more diluted material. Depending on your skin type, you may have to make a couple of toners before you get the one that fits your skin the best.

4. Pour a little of the fully prepared substance onto a clean cotton pad for application

Treatment starts by cleansing your face. Ensure that you do not apply anything else on your face before your toner is dry. After it dries, you are free to use your preferred lotion or cream. Repeat this procedure twice a day until you achieve your goal. You may also consider using your toner every time you wash your face.

The toner may not work for everyone, but it has shown positive results for many people who had used almost all other approaches to cure acne without getting anything positive. As it is with every treatment method, this natural and organic substance requires care and responsiveness for it to deliver the expected impact.

apple cider vinegar

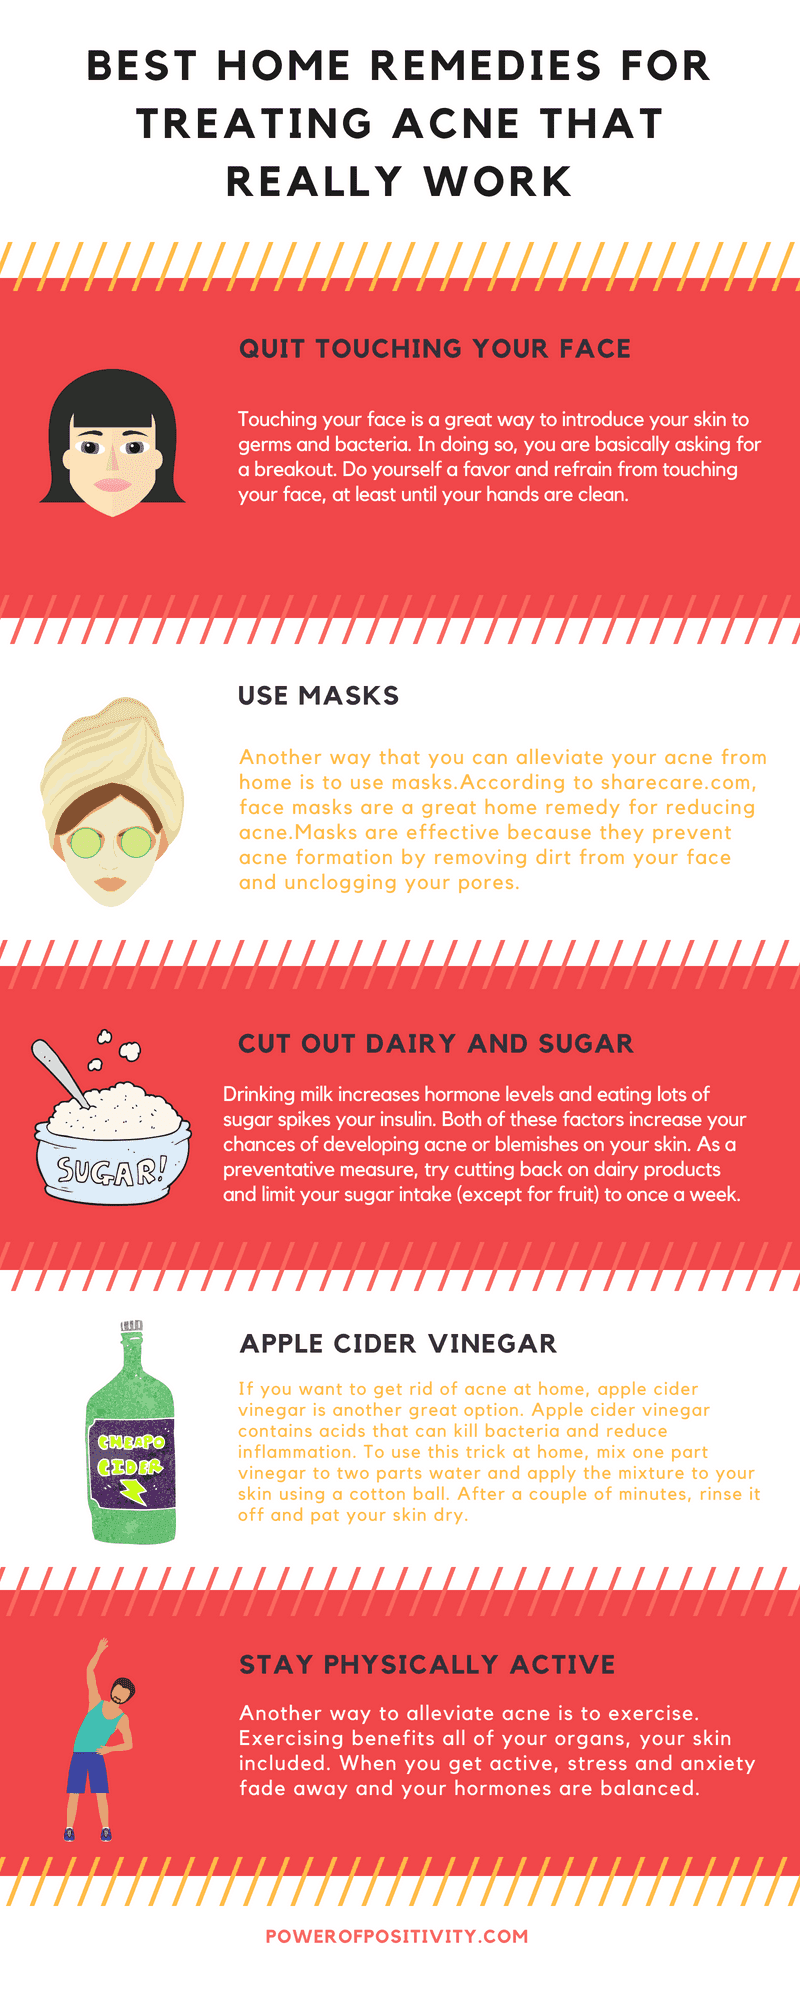
Based on the information on WebMD, the alcohol contained in apple cider is turned into vinegar by bacteria and yeast during fermentation. Vinegar helps in fighting bacteria that causes acne. According to Healthline, apple cider vinegar has citric, succinic, lactic and acetic acid. These acids have been proven to have the ability to kill P. acnes that are scientifically known as Propionibacterium acnes. This bacteria is the primary cause of acne in humans.

Home remedies for treating acne

Additionally, the acids defend your body against acne scars through reduction of inflammation while smoothing out the pigmentation and texture of your skin. In many cases, acne leaves deep dark or red tones on your skin after healing. It may affect part of your face or the entirety of it. Apple cider vinegar for acne cures any acne since it attacks the primary cause of the illness. The substance has a strong smell that may not be pleasant for you, so prepare yourself for it in advance.

50 Easy Ways to Flush A Bloated Stomach

A bloated stomach can be one of the worst feelings in the world. That stuffed feeling around your stomach can make you feel so uncomfortable and unattractive. Bloating, which is common to everyone, happens for a number of reasons. But we have good news! It’s easy to flush the belly boat by eating the right foods, avoiding certain ingredients, and making a few lifestyle changes. Here are some ways to follow to achieve a positive result against bloating:

Here Are 50 Easy Ways to Flush A Bloated Stomach

“It feels like your belly is a glass constantly full of water, and if you try to put anything else in the glass, it will overflow.” – Grace Shockey

1. Almonds

Snack on unsalted almonds in the afternoons to aid digestion, as well as give you an energy boost.

2. Asparagus

Eating asparagus, which is rich in fiber, helps regulate your gut bacteria.

3. Avocado

This fruit contains monounsaturated fats that make you feel full without the stomach bulge.

4. Bananas

These fruits are rich in fiber and potassium. Munch on bananas after meals, or add to your cereals and pancakes, or make a smoothie.

5. Broccoli

Eating half a cup of broccoli can reduce the bloat. Make sure to steam or cook it first as some people can develop gas from eating this veggie raw.

6. Brown rice

Compared to white rice, brown rice is easier to digest.

7. Caffeine

Drinking coffee stimulates the muscles in your colon. If you have constipation, a cup of Joe after a big breakfast can help relieve this stomach problem.

8. Cucumbers

This crunchy vegetable flushes down excess water in the body.

9. Fruits with high water content

Watermelon, honeydew, and cantaloupe can flush out the sodium that causes belly bloat. It also improves blood flow and brings your body energy.

10. Fruits with skin

Apples, pears, or any fruit with skin are fibrous and thus beneficial to the digestive system.

11. Ginger

Ginger is popularly used in Eastern medicine for many purposes, including relief for digestive issues. Add fresh ginger to your salads, smoothies, juices, and stir-fry meals.

12. Lemon water

Lemon works as a diuretic and reduces water retention.

13. Lettuce

This green, leafy vegetable has many nutrients. It’s also full of fiber that fills up your stomach without the bloat.

14. Oatmeal

Have a healthy breakfast full of fibrous oatmeal, but make sure that your bowl isn’t filled with sugar.

15. Papaya

This exotic fruit has enzymes that help the digestive tract and relieves the feeling of heaviness around the belly.

16. Peppermint tea

Drinking peppermint tea helps relax the muscles in the stomach, thus you get instant relief from bloating, gas, and cramps.

17. Potassium-rich foods

Spinach, mangoes, and tomatoes are loaded with potassium that can banish a bloated stomach and offset your sodium intake.

18. Probiotics

Yogurt, kimchi, miso, kefir, sauerkraut, and pickles are loaded with good bacteria called probiotics that regulates the gut and helps with digestion, so you avoid a belly bloat, as per the Cleveland Clinic.

19. Quinoa

This food relieves menstrual cramps and reduces bloating because it contains potassium and magnesium.

20. Salmon

Rich in omega-3 fatty acids, salmon reduces stomach inflammation.

21. Water

Constipation causes a bloated stomach but if you keep yourself properly hydrated with water, you can avoid this problem. Drinking a glass of water 30 minutes before a meal also helps with weight loss, as per a study in the research journal Obesity.

22. Avoid alcohol

One glass of wine is fine but too much alcohol can dehydrate your body so you feel puffier and bloated.

23. Avoid gum

Chewing gum leads to more air in your gastrointestinal tract that can cause your stomach to expand.

24. Avoid processed meat

These foods are packed with salt that makes digestion difficult.

25. Avoid protein bars

This food contains soy protein by-products that cause belly bloat.

26. Avoid Seltzers

Though not as bad as sodas, the bubbles in seltzers make your belly expand.

27. Avoid starchy food

Eating baked potatoes, pasta, and other starchy foods during dinner can lead to water retention that will make you feel bloated in the morning.

28. Avoid sugar-free treats

Anything “sugar-free” might sound healthier – but these foods have maltitol, sorbitol, and xylitol that can cause digestive problems.

29. Ditch straws

Ditch the straws in your drink to prevent excess air from getting trapped in your digestive tract.

30. Less salt

Sodium is one of the most common causes of stomach bloating. Eating salty foods brings excess fluids in your body that leads to the swelling of your ankles, feet, and stomach, according to Heart Failure Matters Org.

31. Fewer sweeteners

Artificial sweeteners make digestion harder and lead to diarrhea or excess gas.

32. Limit bread

This food has high sodium content but many people don’t know it.

33. Limit dairy

Milk and cheese can lead to major bloating issues, especially if your body has a harder time breaking down lactose. Experts say that 75 percent of the world’s population is lactose intolerant.

34. Limit frozen meals

While convenient, frozen meals are preserved with too much sodium, which is bad for digestion, among other issues.

35. Limit gassy veggies and beans

Cabbage, Brussels spout, and beans are known to cause constipation. Limit your intake of these foods when you’re feeling bloated.

36. Limit heavy sauces

Sauces might add flavor to your food but they’re often high in salt. Use spices instead to lend flavor to your dishes.

37. Skip fried foods

Anything fried makes digestion harder, so you end up feeling bloated.

38. Skip gluten-free products

Gluten-free foods are still processed and have low fiber content, so these can be harder to break down in the stomach.

gluten

39. Belly stretches

Before getting up in the morning, do belly stretches by lying on your back and pulling your knees toward your tummy. This soothes your stomach and prevents bloating.

40. Control antibiotic intake

Antibiotics can change the patterns in your gut, so you feel uncomfortable. Ask your doctor for an alternative if gas and bloating due to antibiotics make you uncomfortable.

41. Eat an early dinner

Enjoy your dinners earlier to give your stomach more time to digest your food before you go to sleep. That way, you shouldn’t feel bloated in the morning.

42. Increase calcium

Take more calcium and calcium supplements during the peak of your menstrual cycle to prevent stomach bloating.

43. Low-sodium recipes

Switch to low-sodium recipes when you’re preparing dishes, especially ones that call for canned soups.

44. Meditation

This mindful exercise can calm the nerves and muscles, as well as alleviate stomach issues, according to a study in the JAMA Internal Medicine journal.

45. Morning exercises

A 20-minute physical routine in the morning can facilitate the movement in your digestive system.

46. Practice yoga

Yoga alleviates bloating and facilitates fat-burning faster.

47. Eat smaller portions

Eat your food in smaller portions and chew slowly to give your brain plenty of time to process that you’re satiated. This also prevents your body from needing to digest too much food.

48. Snack smart

A cup of yogurt with fruits between breakfast and lunch will curb binge eating, keep your weight ideal, and reduce the bloating.

49. Transfer canned foods

If you love snacking on canned fruits and veggies, transfer these into a different container and run under cold water for a few minutes before eating to remove the extra sodium content.

50. Tummy massages

Giving your abdomen a good massage can stimulate movement in your digestive tract and get rid of stomach gas.

Final thoughts

bloating

While a belly bloat isn’t something to be ashamed of because it is pretty common, experts suggest losing some weight to flatten the belly and rid yourself of the discomfort of a bulging stomach. Apart from positive thinking, doing regular exercises for the abs can also make your stomach muscles firmer and stronger.

Women Who Want Glowing Skin Should Drink Orange Juice: Here Is Why

Cosmetics are meant to make one appear beautiful. However, most times, these skin improving products end up having a destructive effect on the user. A study conducted by the National Center for Biotechnology Information (NCBI) revealed that men experienced reproductive complications between 197o and 1993. These problems were as a result of overuse of cosmetic products that were made from harmful chemicals. This issue of skin problems has been left unaddressed for too long while the manufacturers continue destroying the end users of their products. The situation can be reversed only when women turn back to the use of natural beauty products that have no side effects.

One of the most underrated cosmetic products that is naturally available is oranges for skin. The benefits of using orange for skin products are almost inexhaustible, and women should wholeheartedly accept their use as it will significantly improve their looks.

The following are some of these benefits that the use of orange juice as a beauty product brings:

1. Source of nutrients

Oranges are a rich source of ascorbic acid, and one serving is enough to fulfill the body’s requirements for Vitamin C. Therefore, if you are looking to improve your skin, taking the juice will bring the additional advantage of improving your general health. In addition to Vitamin C, the juice is also a rich reserve of minerals such as magnesium, potassium, and folic acid.

Folic acid greatly helps the body’s vital organs, such as the spinal cord, perform effectively. Taking oranges regularly has also been found to help manage weight loss. The health benefits of taking the juice are almost endless, and women who use it frequently are set to have a significant health improvement.

2. Minimizes skin pore size

The skin has pores that excrete waste from the body. At times, these pores can expand, and this makes a face appear oily. Application of orange juice can solve this problem. The juice causes the shrinking of pores, and the result is a smoother skin that is highly radiant. To get the best results, it is advisable to apply the juice, then wash it off with clean water after about three minutes. The large pores will be sealed in a short time, and your face will be left shining without having applied any commercial cosmetic product.

3. Eliminates acne

Nobody likes to have acne on their face. Many people with frequent acne try to establish a smoother skin with artificial beauty products. Unknowingly, the cosmetics end up causing the development of more acne, and if healing occurs, large marks are left. The solution to these problems lies with the use of natural orange juice. The juice contains citric acid. This acid is beneficial in removing the dead skin without leaving marks on the face. To gain the best results, it is advisable to apply the juice regularly. Your face will brighten like never before.

4. Effective bleaching without side effects

The other most commonly used beauty product is bleaching agents. Mainly, these products are used by people who want to have a lighter skin tone than their present one. Although the cosmetics are useful in giving the desired result, the after use effects can be adverse. Some people develop cancerous complications as a result of the application of these cosmetic bleaching products.

An alternative way of having a lighter tone without the risk of developing complication is applying a mixture of orange juice and milk. The curd mixture should be applied and then washed off after twenty minutes. Your skin will be bleached slowly without experiencing any after use effects, and you are free from contracting skin related cancerous complications.

5. Aging remedy

As one gets old, one of the first organs to change its appearance is the skin. However, oranges have been found to maintain young, vibrant skin that is free from wrinkles resulting from old age. This is because orange juice is rich in Vitamin C that is necessary for the production of collagen. Collagen is the chemical that is responsible for keeping the skin moist and free from wrinkles.

orange

6. Body and skin detoxification

Toxic chemicals in the body result in pale skin. Therefore, there’s a need to continually expel the toxins for maintenance of radiant skin that is moist at all times. Oranges have been found to be an effective detoxifier that discharge all the harmful chemicals that give your skin an unattractive appeal.

7. Scrubbing

The skin peelings of orange are also helpful. They can be used to make scrub powder when dried that removes dead skin from the face. When mixed with hot water, these peelings form a spray that is useful in keeping the skin glowing at most times.

The benefits of using oranges for skin are immense, and the entire body will also benefit in the long run. Therefore, it’s advisable to turn to the use of natural skin care products, as their advantages are incomparable to the adverse effects brought about by the artificial cosmetics.

10 Homemade Coconut Oil Uses That Will Save You Thousands

People everywhere are beginning to learn how coconut oil, which has been around for centuries, is such an immensely beneficial fat to have in their daily diets. What they may not realize, however, is that this magical oil is not just good for improving their health from the inside. It can help in so many more ways ranging from skin and hair health all the way to naturally cleaning your home.

When looking at the abundance of health and beauty products in the world, you can see they normally come with a hefty price tag. Likewise, many cleaners people use are made of unhealthy and potentially toxic chemicals. Coconut oil can replace many of these expensive and toxic products, which will save you money and make way for a healthier home.

Keep reading to learn 10 coconut oil uses.

oil pulling

Tame Frizzy Hair

Let’s face it. Sometimes with the environment and climate, our hair can pay a price. Instead of paying a fortune for hair serums, use coconut oil. Dab a small amount of this oil towards the ends of your hair and say goodbye to frizz.

Keep Insects Away

The smell of store-bought insect repellents is just too much, not to mention that they are also made of harmful chemicals. By combining one-half cup of coconut oil with 10 drops of tea tree oil, you will create a bug spray that is all natural as well as nourishing for your skin.

Condition Wood and Leather Furniture

When you pay good money for nice furniture, you want to be sure you take care of it. Spraying it with chemicals is not the type of love valuable furniture needs. Instead, try using coconut oil after you clean your furniture in order to bring out its natural shine for years to come. Simply apply the oil and buff it in with a soft cloth.

Teeth Whitening

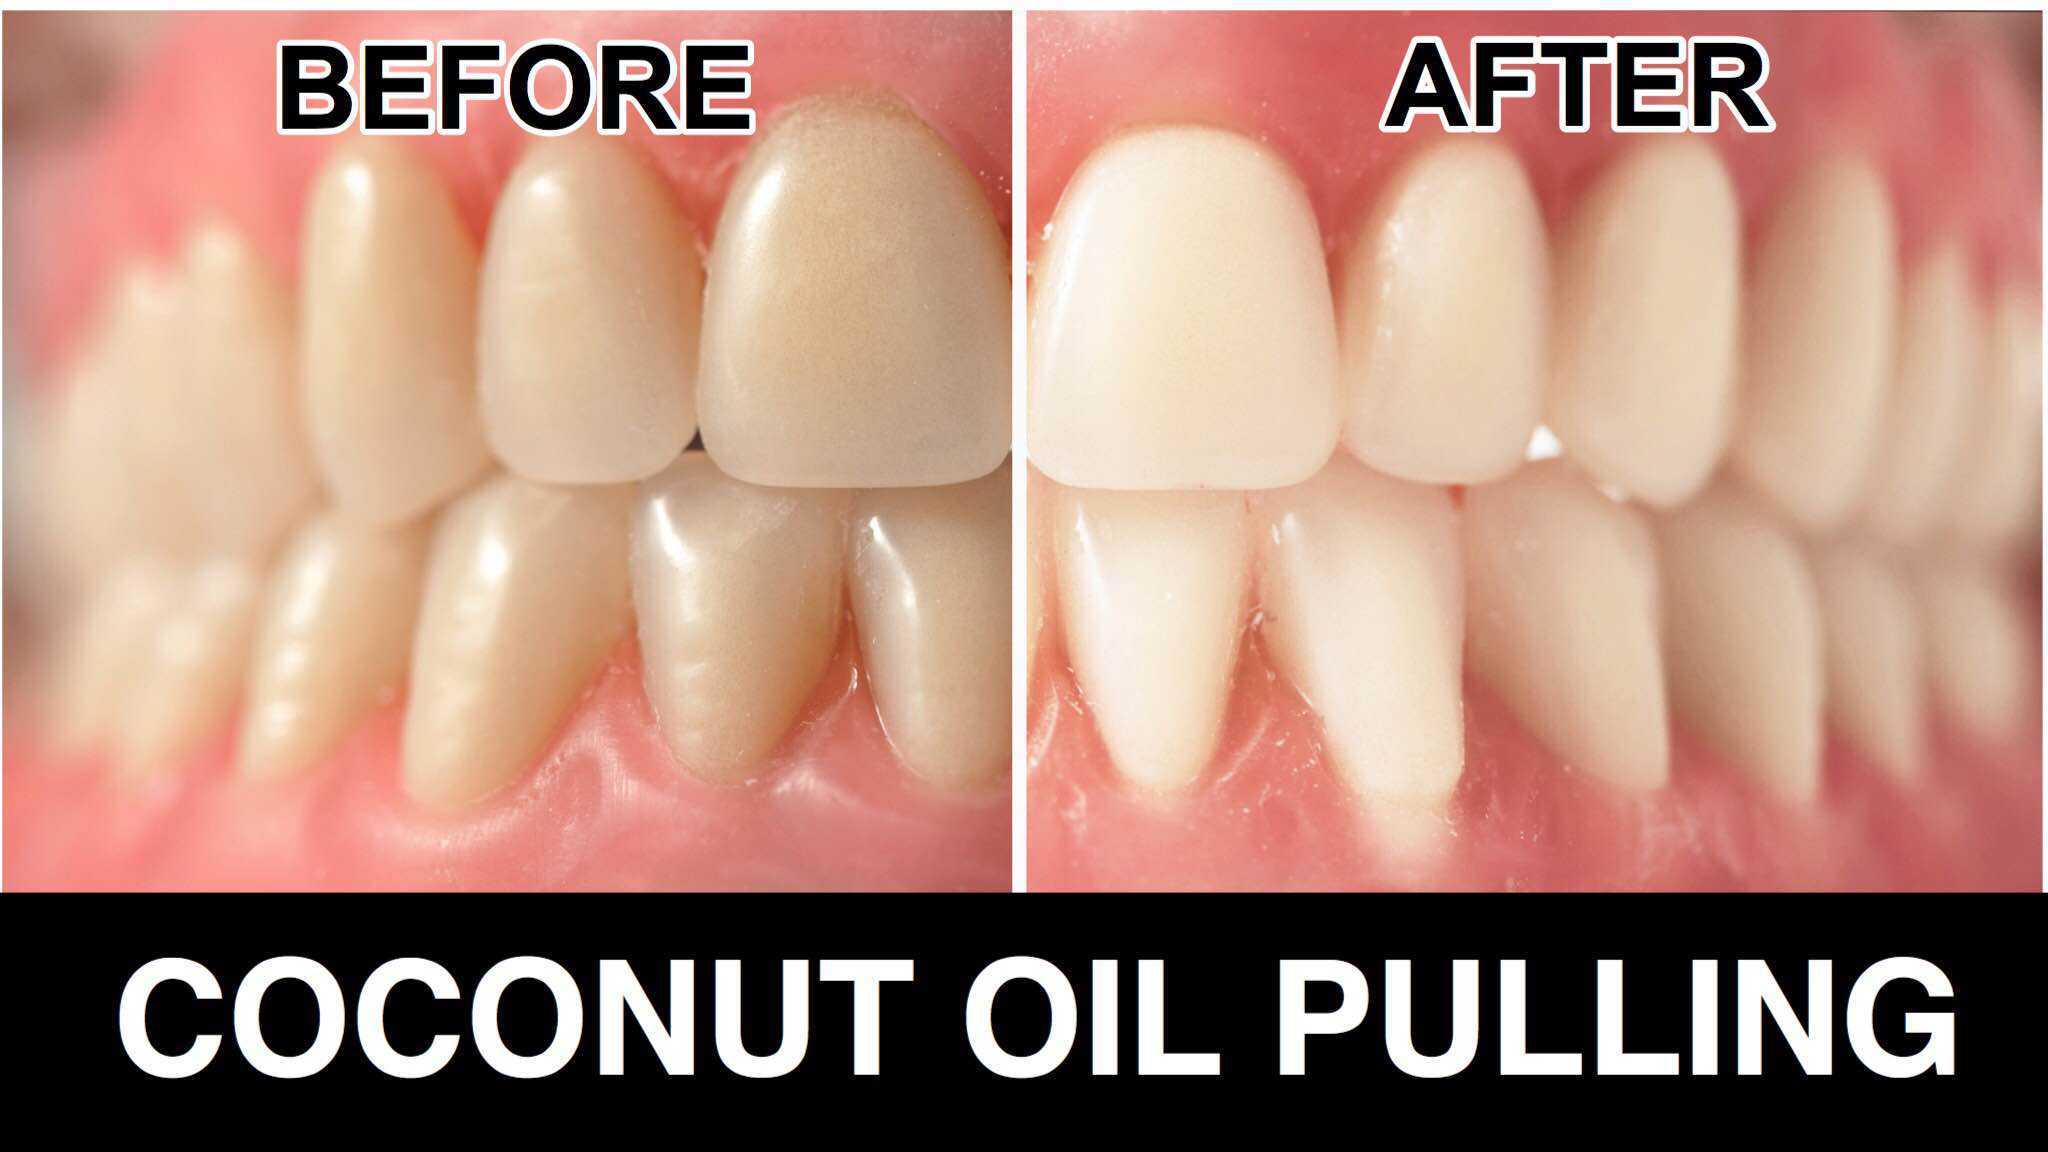
Everyone knows dental whitening treatments are great, but costly. Many whitening types of toothpastes are full of chemicals. In order to whiten your teeth naturally, all you need is oil from a coconut. Take a teaspoon of this fantastic oil and perform what is called oil pulling. Swish this oil around in your mouth for 20 minutes. This will kill bacteria, reduce plaque and help whiten your teeth naturally.

Moisturize Skin, Hair and Nails

Moisturizing is an excellent way to use this oil. Using the oil as a shaving balm will leave your skin silky smooth after shaving, and applying the oil after a shower will lock moisture into your skin. After shampooing your hair, a light application of the oil will keep your hair moisturized and shiny. Finally, massaging this oil into your cuticles and around your nail beds will keep your cuticles moisturized as well as keep you from forming ridges on your nails due to dryness.

Banish Soap Scum

By using this multi-purpose oil on a damp sponge and perhaps adding baking soda or vinegar to boost its cleaning power, you can easily remove soap scum from your bathroom areas without the use of nasty chemicals.

Homemade Deodorant

By mixing together 1/3 cup of coconut oil, 1/4 cup of baking soda, 4 tablespoons of cornstarch and any essential oil you wish, you will create an all natural deodorant that will keep you fresh all day.

Help Soothe a Sore Throat

By swallowing a teaspoon of oil from coconuts, you can help calm sore throat pain. Another great way to accomplish this is to mix a spoon of this oil in your favorite tea. Add honey or some lemon juice to amp up the flavor.

coconut oil

Polish Your Shoes and Expensive Bags

Just like your furniture, some clothing and accessory items cost a pretty penny. This is why oil from coconuts is best when cleaning and maintaining these items. It will clean and condition the leather, preventing it from drying out and cracking. Always preserve the beauty of your accessories naturally.

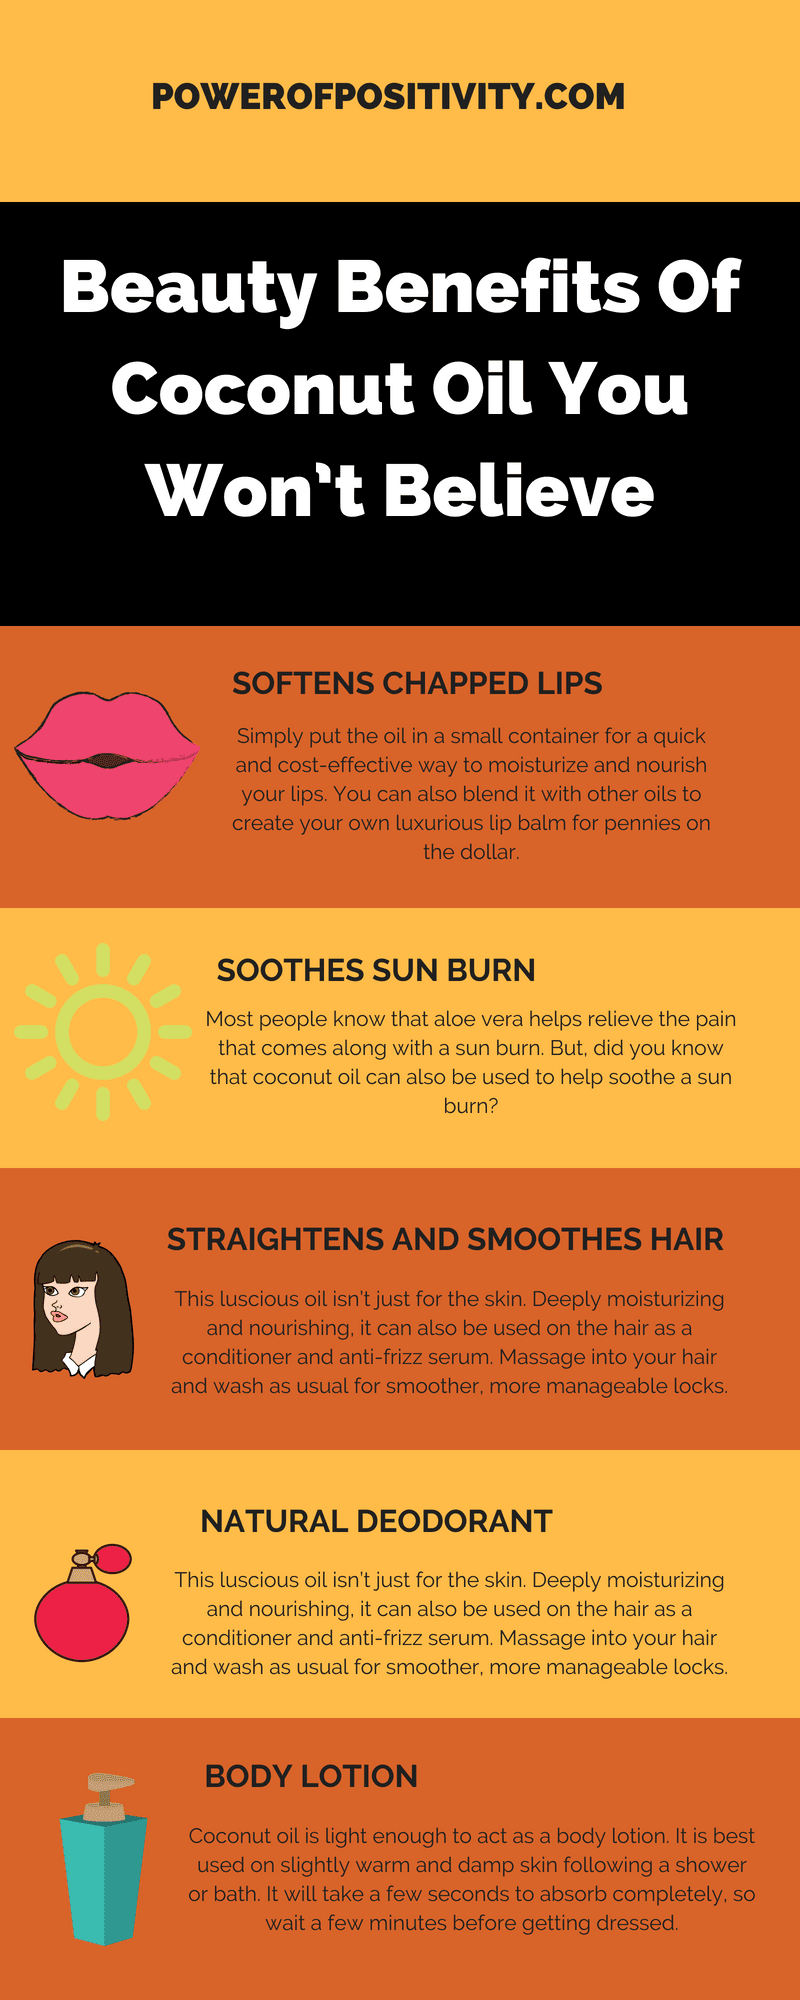
Beauty benefits of coconut oil

Brighten and Exfoliate Your Skin

By combining this multi-purpose oil with orange peel powder, finely ground walnut shells or a host of other natural ingredients, you can create body scrubs and face masks that will give you soft skin, lessen skin discoloration and lock in valuable moisture. This will give you gorgeous and youthful skin.

As you see, coconut oil uses are not limited to simply aiding your dietary needs. This fantastic gift from nature, which is not expensive compared to the many items it can replace, can really go a long way in helping you better your health and possessions. By replacing just a few items in your daily life with this oil, you will improve your family’s life.

Everything You Have Ever Wanted To Know About Apple Cider Vinegar For Weight Loss

Everyone who is trying to lose weight looks for dietary changes and supplements that may help them achieve their goals. Apple cider vinegar has become popular among people who are trying to lose weight. It is a natural preparation that is inexpensive and easy to find. Taking a small amount of vinegar in the morning is reported to help the body manage blood sugar more efficiently and make you feel full longer after meals.

We have examined the benefits and side effects of apple cider vinegar for weight loss so you can make an educated decision about this possible weight-loss aid.

What is Apple Cider Vinegar?

Apple cider vinegar, or ACV, is made from fermented apple juice. When yeast is added to the juice, it ferments into alcohol. Bacteria consume the alcohol and turn it into acetic acid. Acetic acid, a short-chain fatty acid, dissolves into hydrogen and acetate when it is digested.

ACV is sold in distilled varieties and in unfiltered varieties where the natural beneficial bacteria remain. Reportedly, consuming ACV with the beneficial bacteria gives more of a weight-loss effect.

Why Take ACV?

Fermented foods like apple cider vinegar can be beneficial because they support the growth of good bacteria in the gut. Healthy gut bacteria has been linked to lower weight and overall good health.

Acetic acid has some documented health effects, though the studies are small and many have been done on animals. Scientists are still working to discover all of the benefits of ACV.

ACV and Obesity

A Japanese study from 2009 found that acetic acid contributed to a greater weight loss than a placebo. The study was divided into three groups: people who took 1 tablespoon of vinegar (15 mL) and those who took 2 tablespoons (30 mL), as well as a placebo group who was not given any vinegar. Study subjects were told to cut down on alcohol but to otherwise live their lives as usual.

After 12 weeks, the study participants who took the vinegar experienced weight loss benefits. They had lower body weight, waist circumference, and BMI. The vinegar users also had lower blood serum triglyceride levels. The Japanese study concluded that vinegar brought significant weight loss benefits to the participants.

Obese diabetic rats were found to have improved outcomes when taking acetic acid. It reduced liver fat and belly fat storage.

Acetate, the compound found in the body when acetic acid breaks down, may also have a positive effect on appetite control.

ACV and Blood Sugar

Another study found that the acetic acid in vinegar helped people with Type 2 Diabetes to improve their insulin and blood sugar levels. A study in rats found that acetic acid lowered blood sugar levels by encouraging the liver to remove sugar from the blood. The same study found that the rats’ ratio of glucagon to insulin was improved, resulting in better diabetes control and more fat burned.

ACV and Feelings of Fullness

A human study found that apple cider vinegar for weight loss lessened blood sugar response after eating a high-carbohydrate meal. The same study noted that participants’ stomachs emptied more slowly, causing a long-lasting feeling of fullness. Insulin and blood sugar were also lowered.

What are some of the Side Effects?

When taking ACV, it is best to dilute it in a glass of water. It is best not to take ACV before exercising since it can cause heartburn and reflux.

Since ACV is highly acidic, it can cause damage to the teeth. Always rinse your mouth thoroughly and brush your teeth after taking ACV.

Ways to Get ACV into your Diet

There are many easy ways to work apple cider vinegar into your diet. Most people choose to dilute it in a glass of water and to have it in the morning as part of their routine. One of the simplest ways to add the vinegar to your diet is to make vinaigrette salad dressings using the ACV.

apple cider vinegar

What Results Should You Expect?

You may find that adding apple cider vinegar to your diet helps you to control your weight. You may find that your appetite is lessened, making you want to eat less. Taking advantage of acetic acids’ many health benefits is smart for anyone who is looking for a simple, all-natural way to lose weight.

Final Thoughts

It’s worth bearing in mind that the studies cited in this article have been relatively small. Still, they point to encouraging results for the use of apple cider vinegar for weight loss. It is a preparation with few risks and possibly great benefits. Try ACV as part of your morning routine or work it into your diet. You may be pleased and surprised by the results.

https://www.youtube.com/watch?time_continue=1&v=yG-G9_LOkLA

(C)Power of Positivity, LLC. All rights reserved
Skip to content